User Guide and FAQ
1. Quick Start Guide
- When the device is powered on for the first time, the screen displays a device hotspot named
Nextion_<last 4 digits of MAC>. Connect to this hotspot from a phone or computer; no password is required.
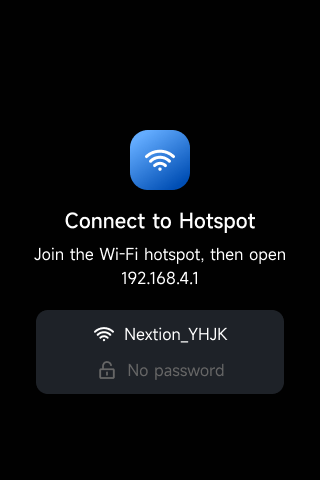
Device Screen
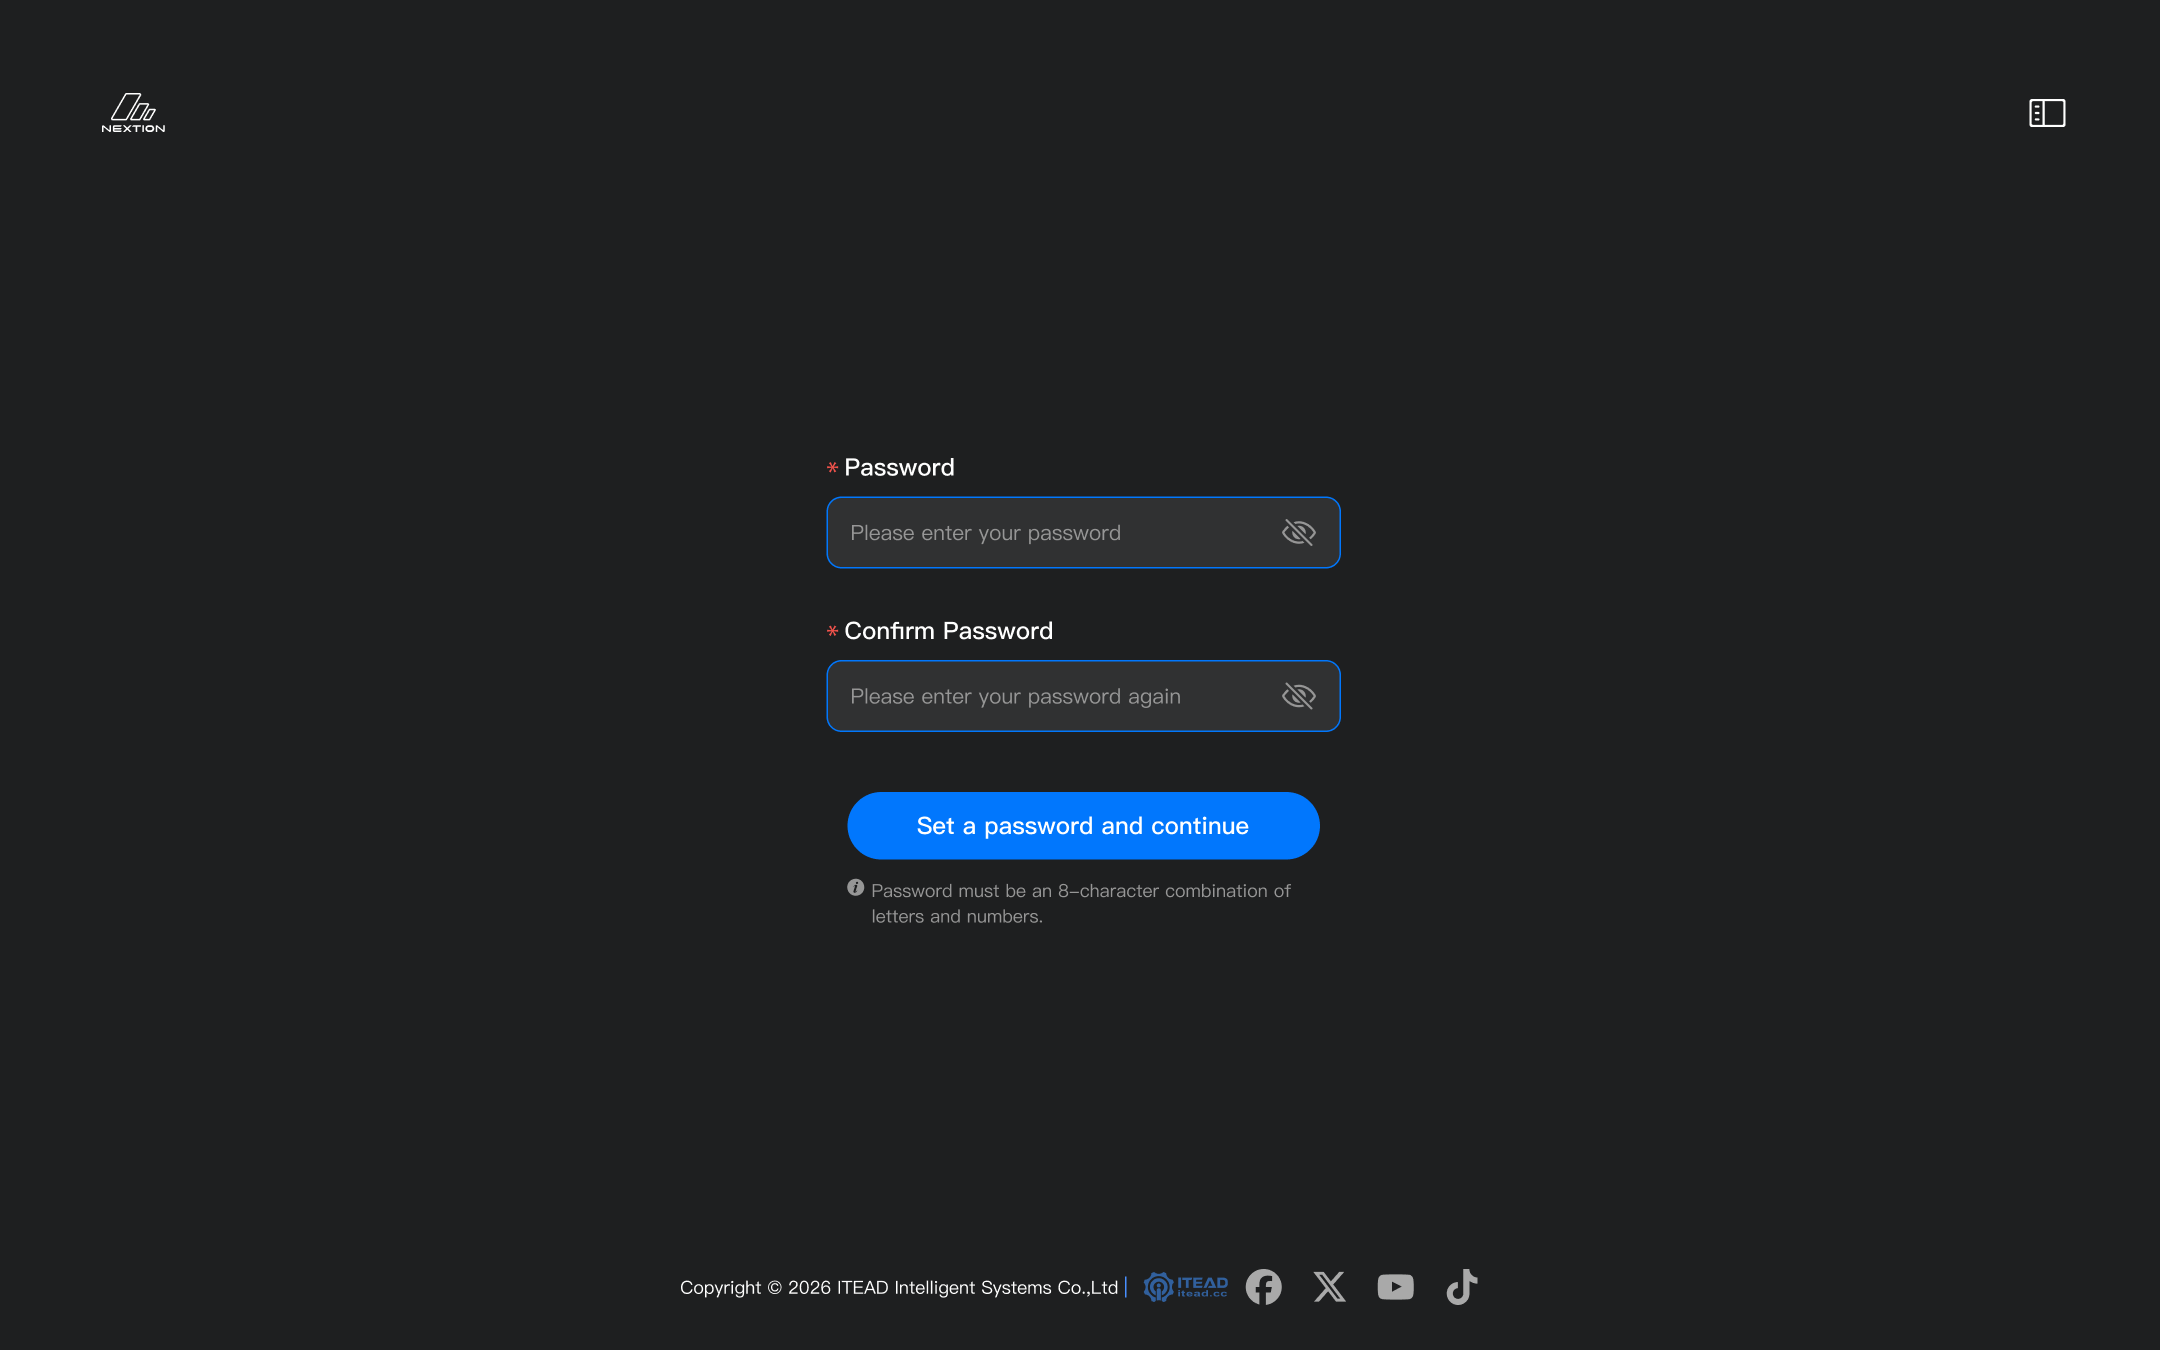
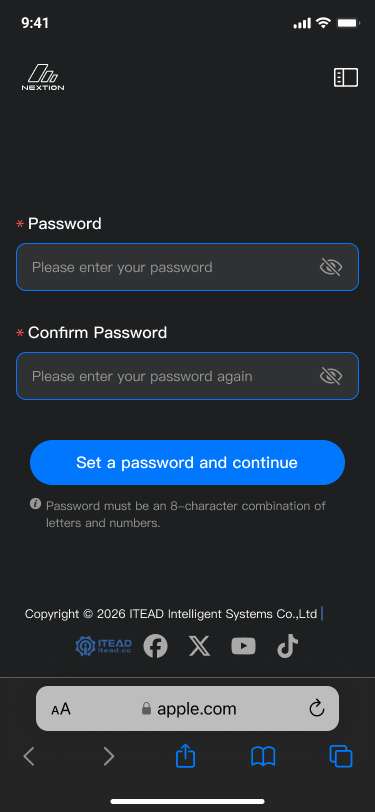
- After connecting to the hotspot, the password setup page usually opens automatically. If it does not, open a browser and go to
192.168.4.1. - Set a password, then enter it again to confirm. After saving, the Wi-Fi setup page opens.
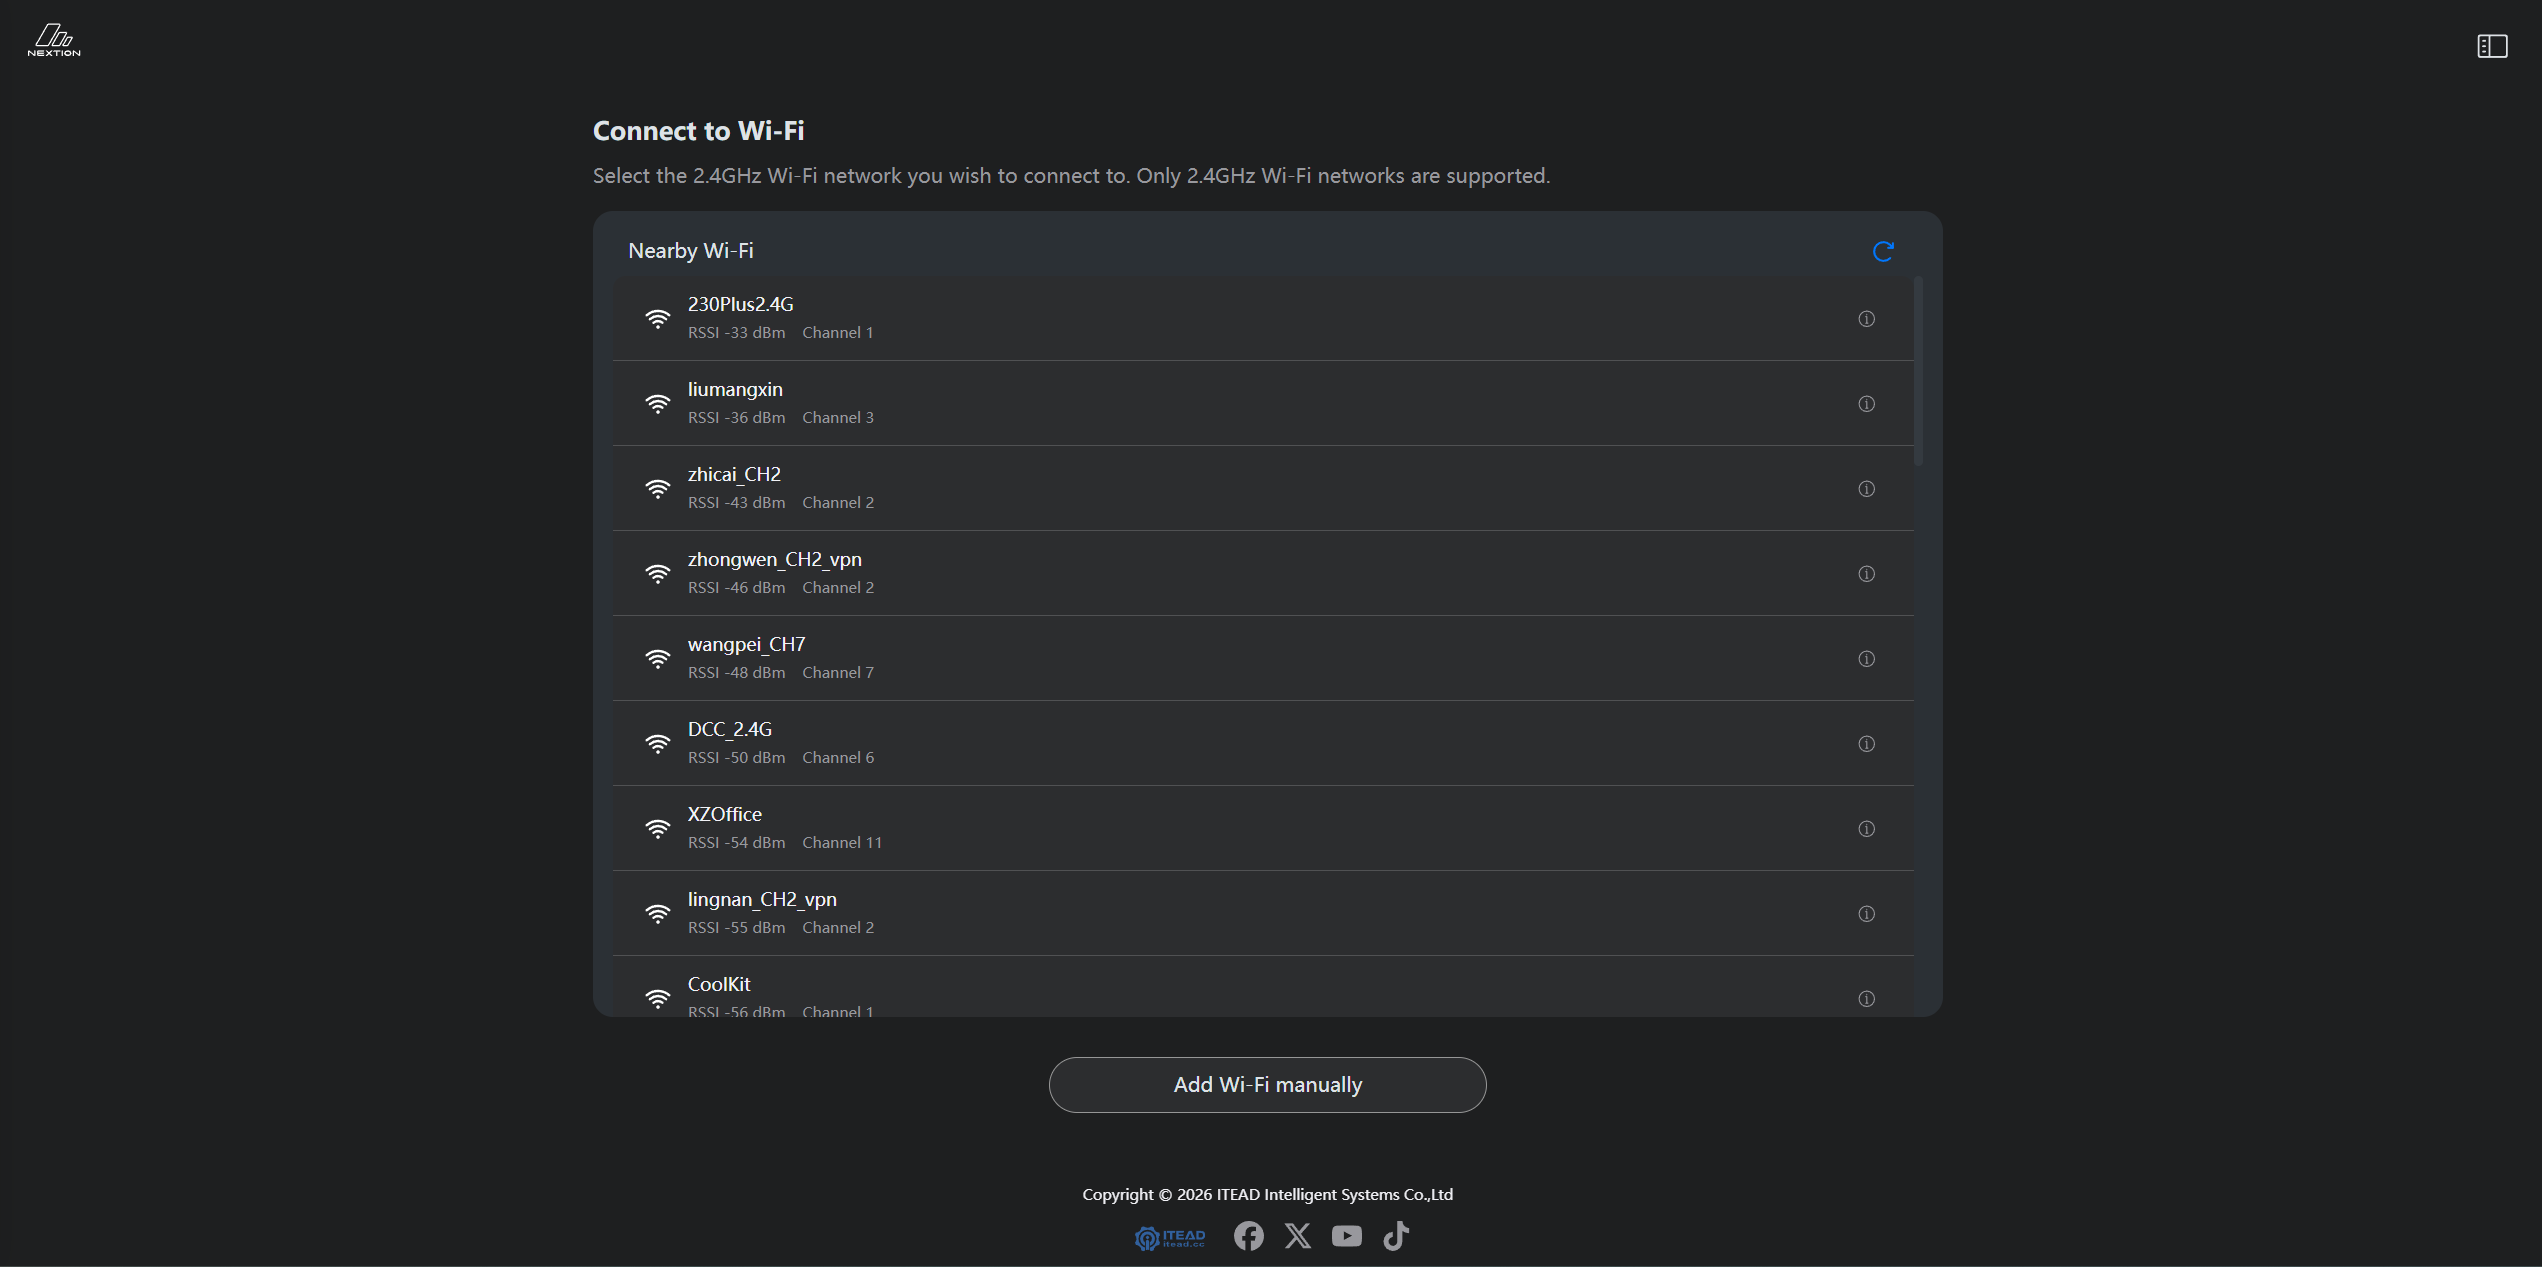
- Select your 2.4 GHz Wi-Fi network from the list and enter its password.
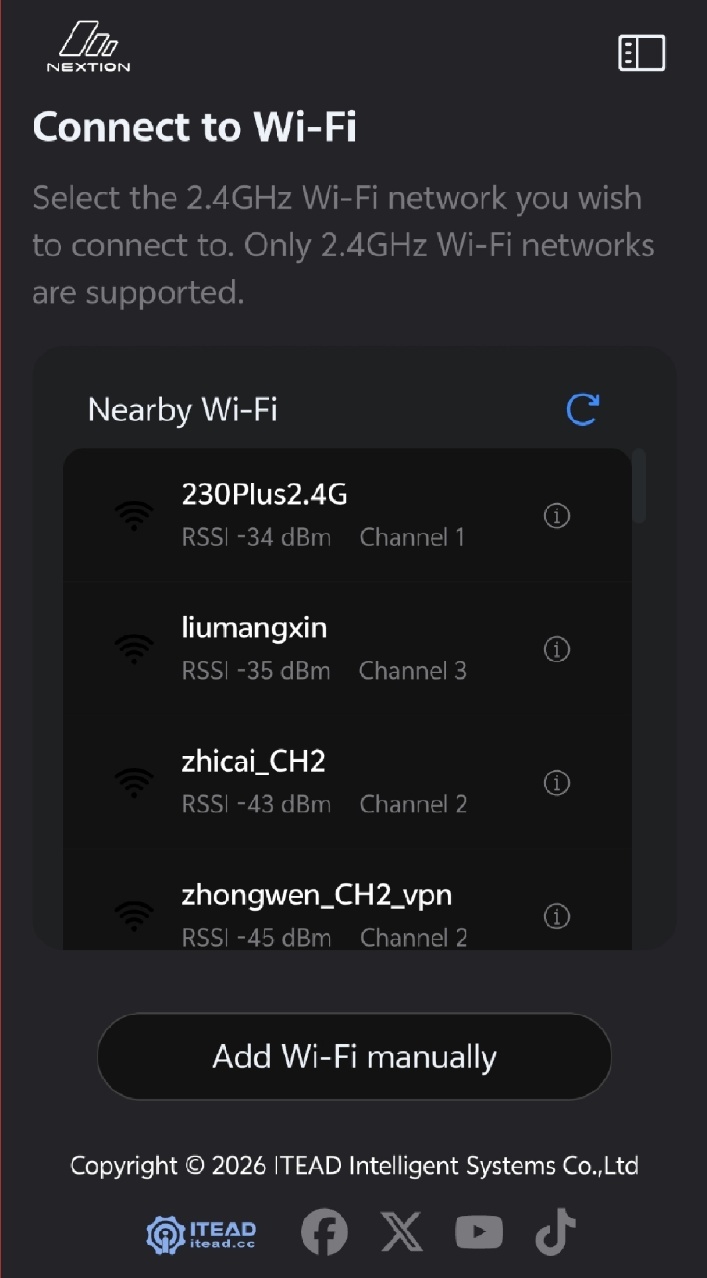
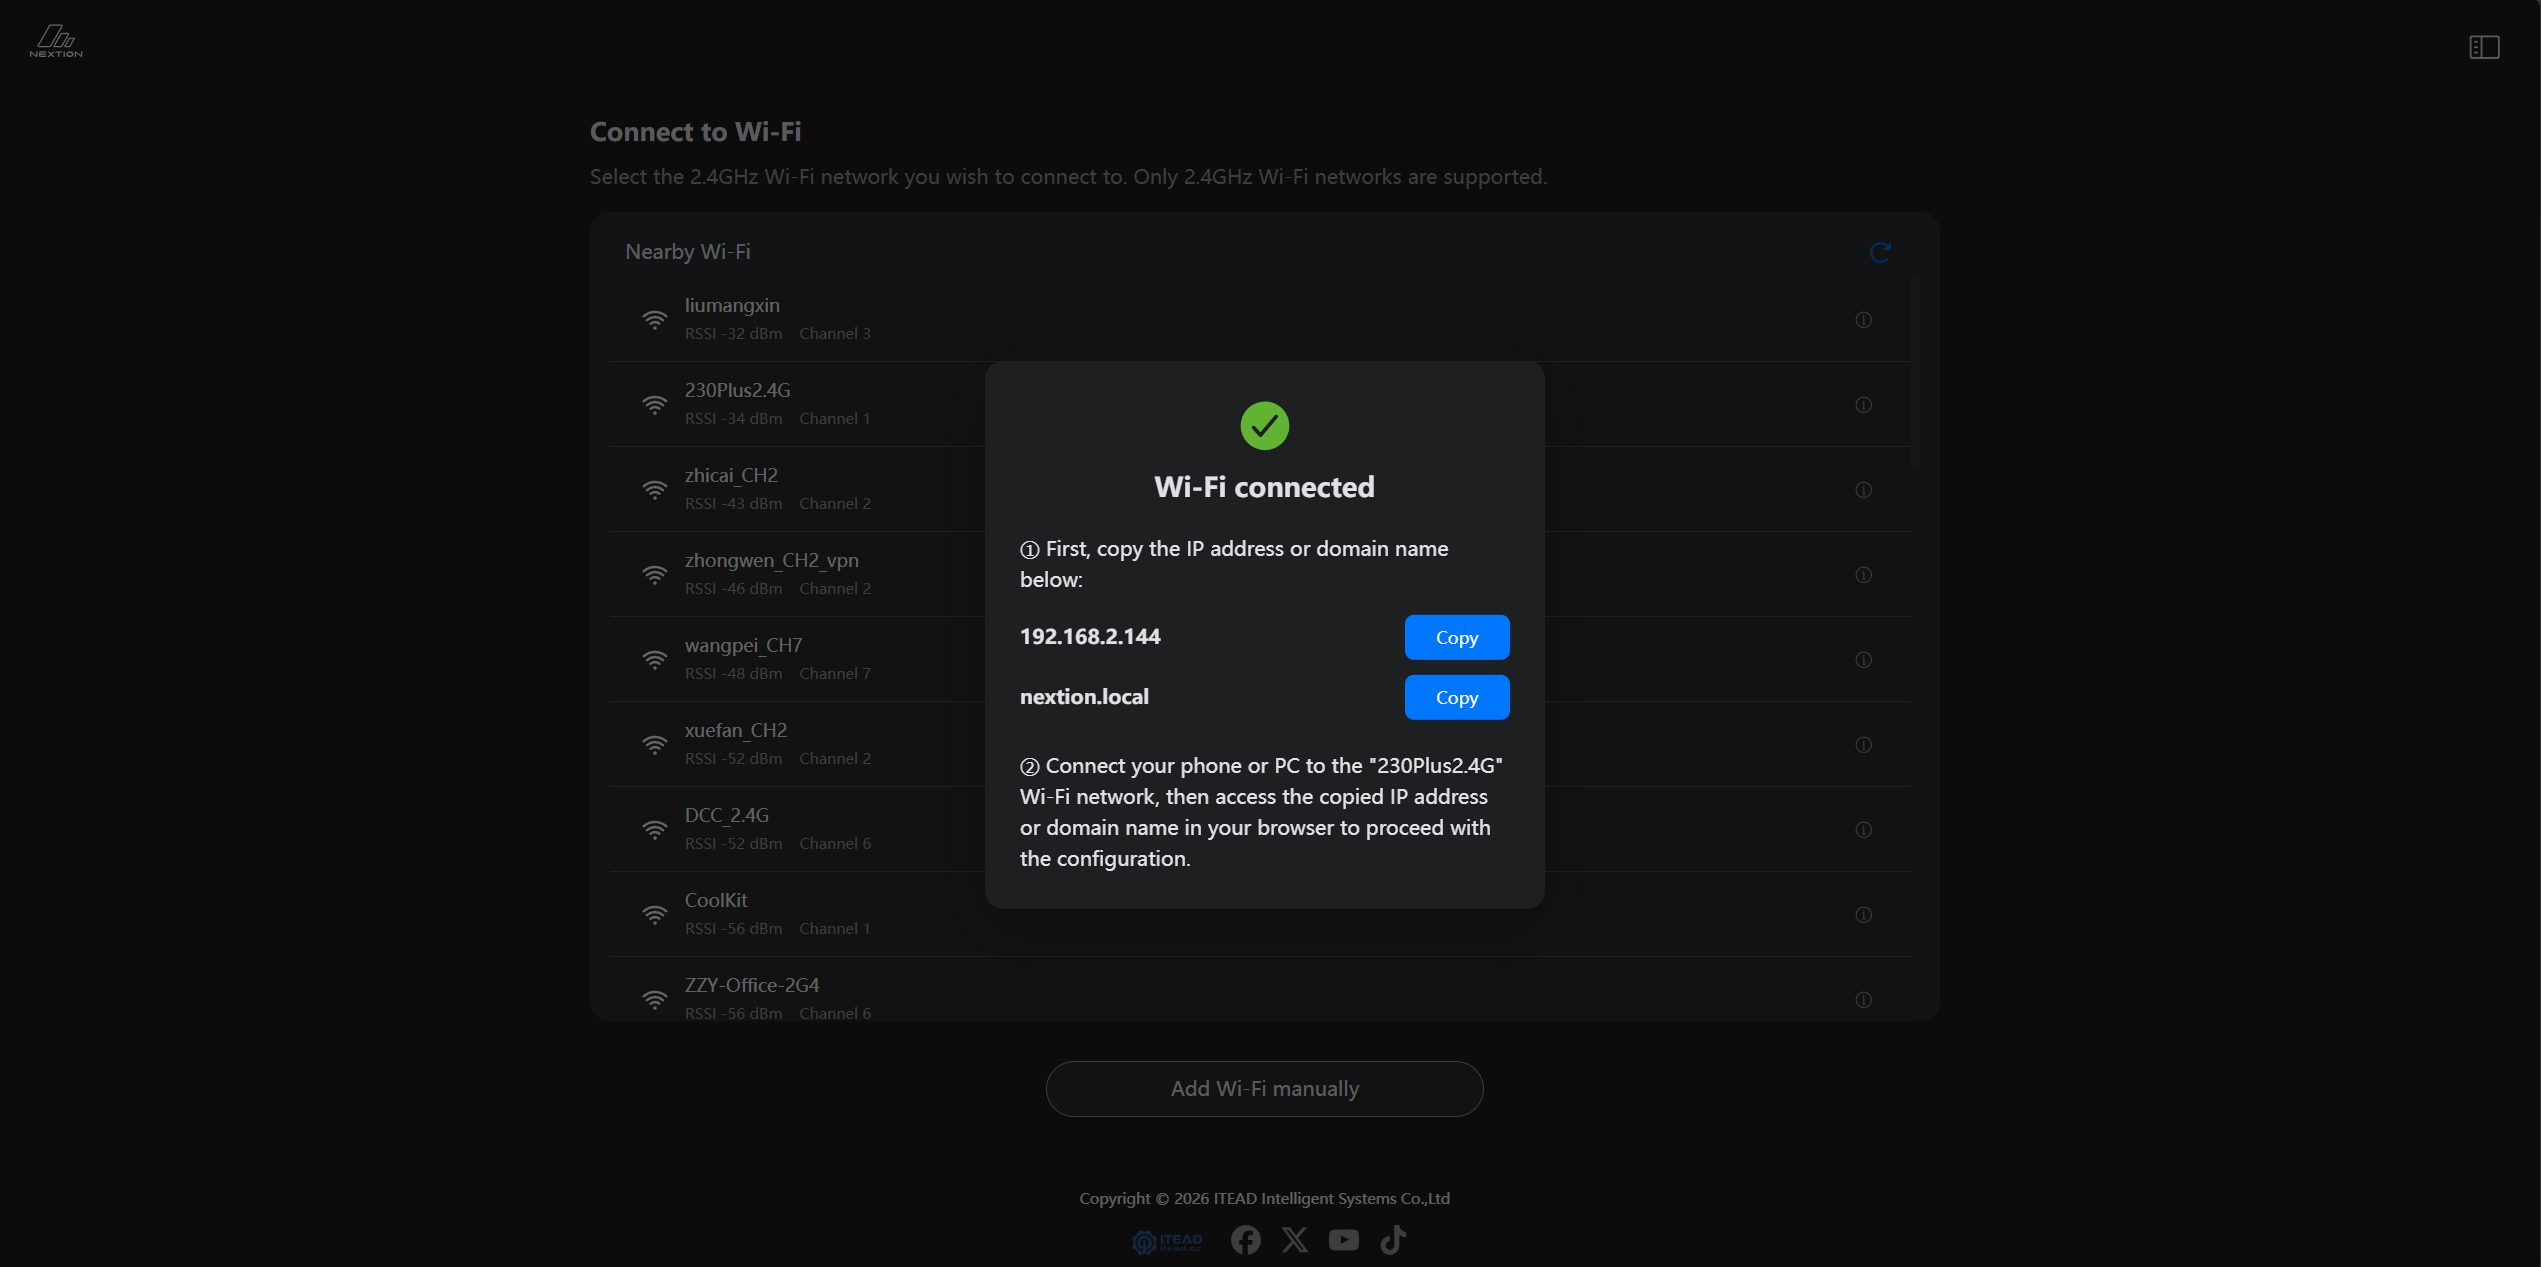
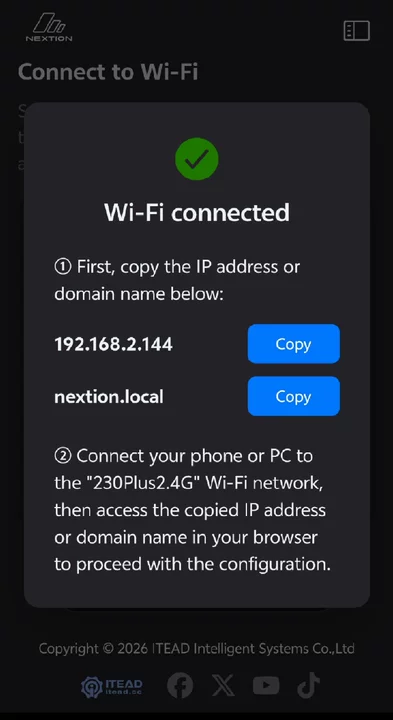
- After the Wi-Fi connection is configured successfully, a dialog appears. Copy the IP address or domain name shown in the dialog, then open the Web Console in a browser.
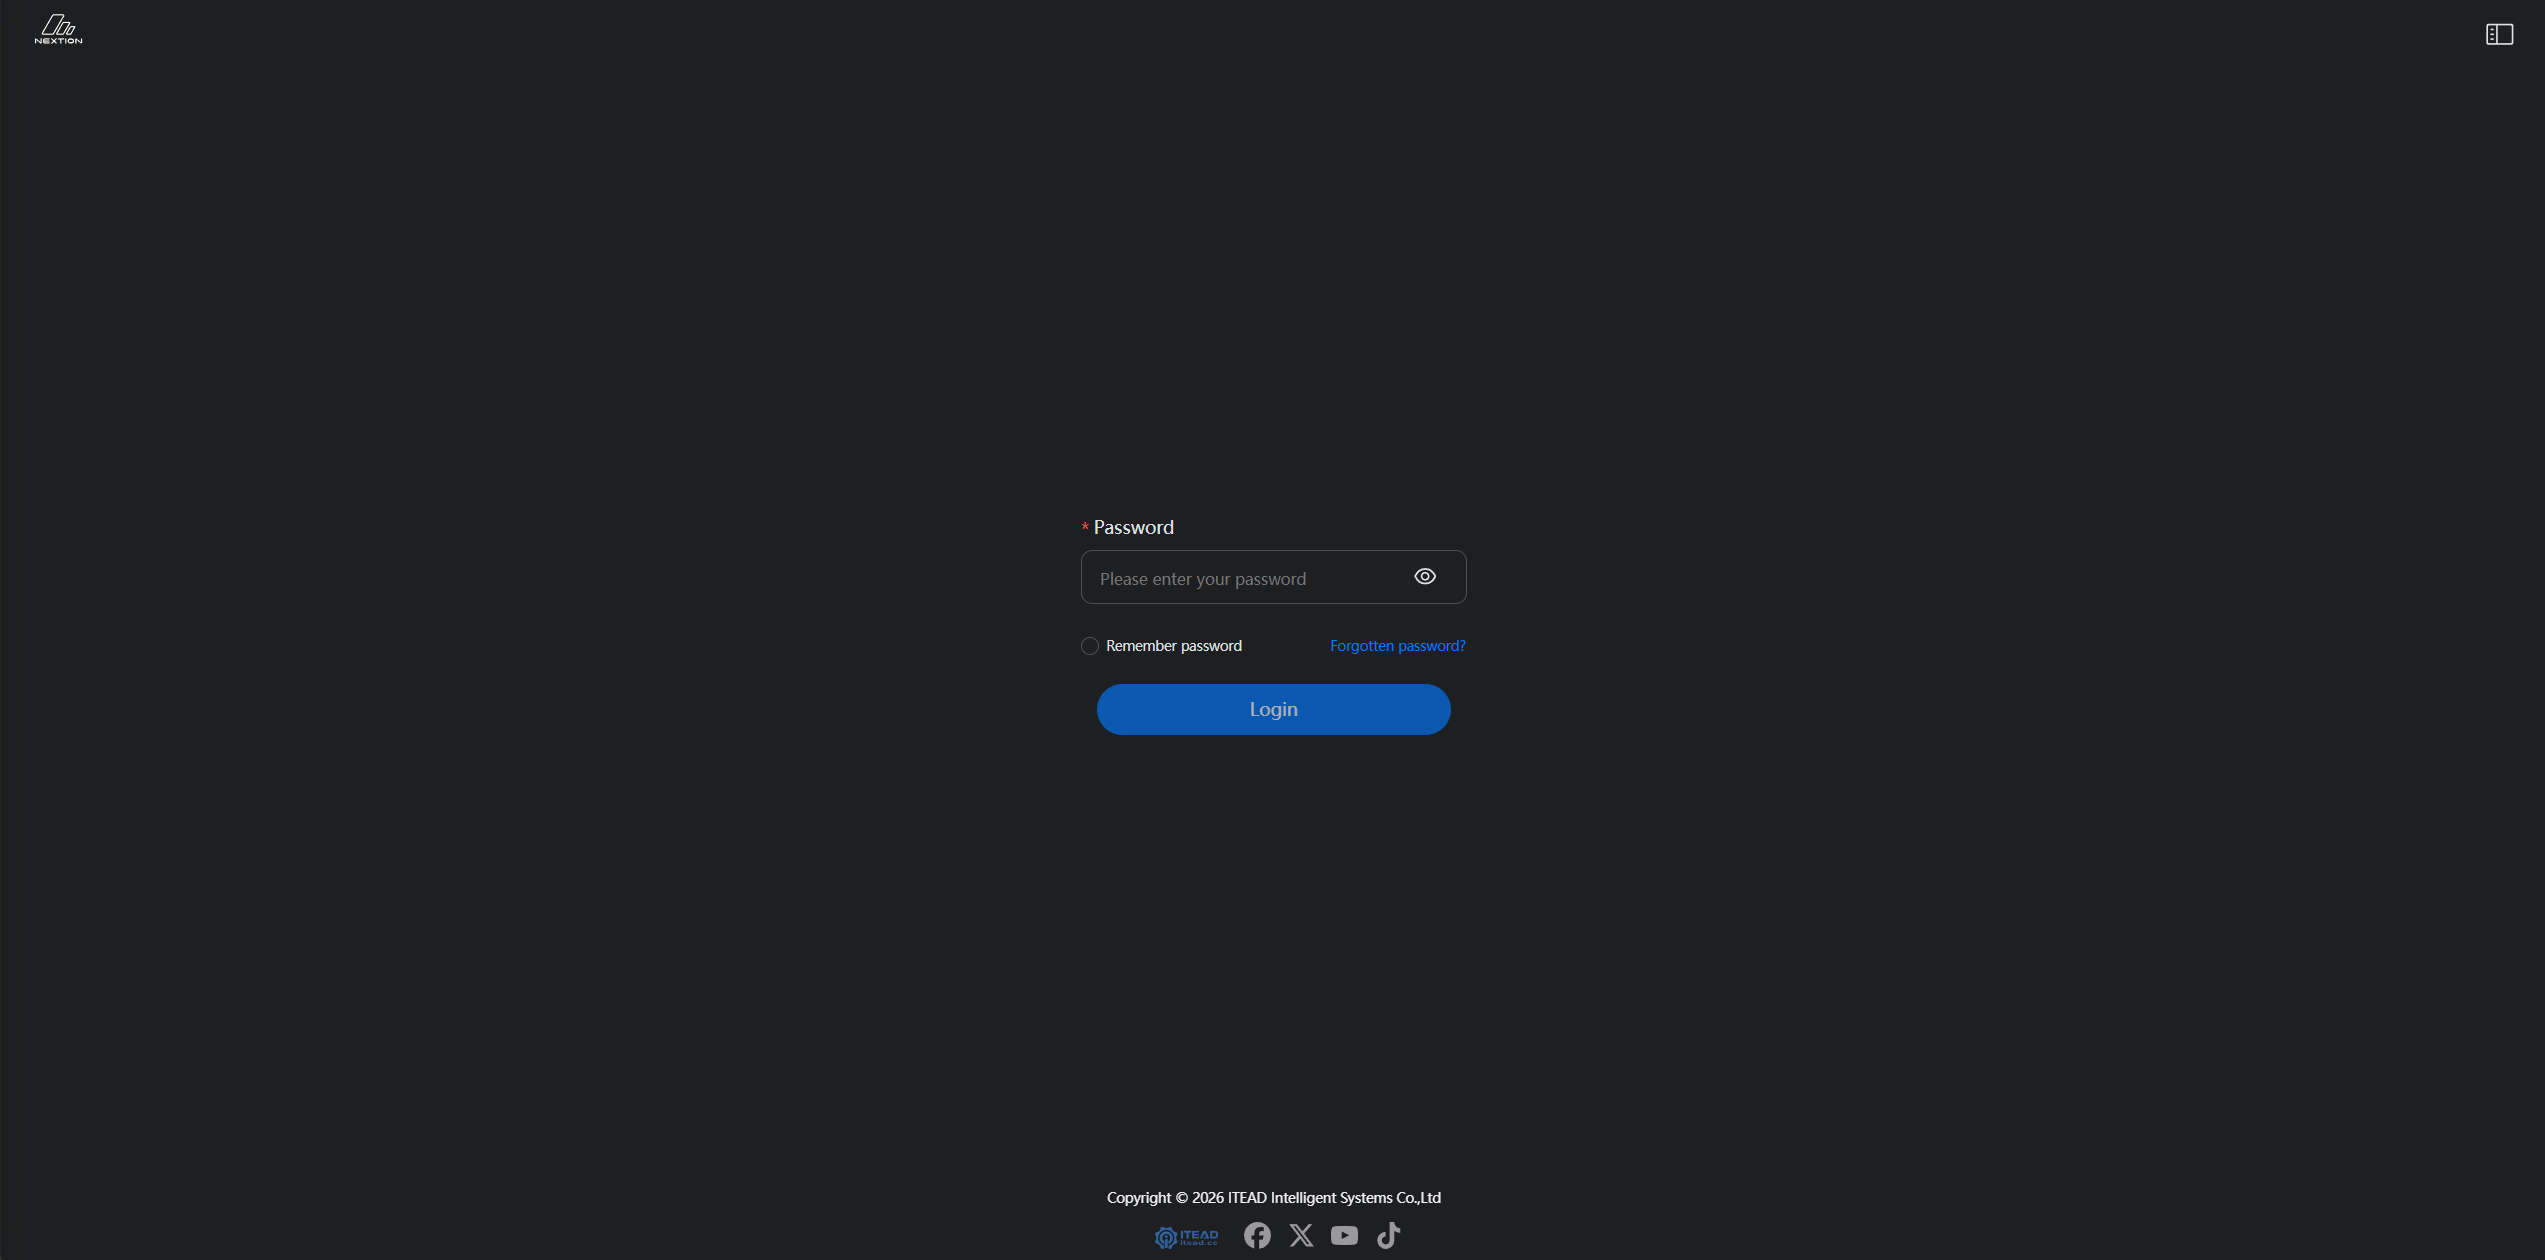
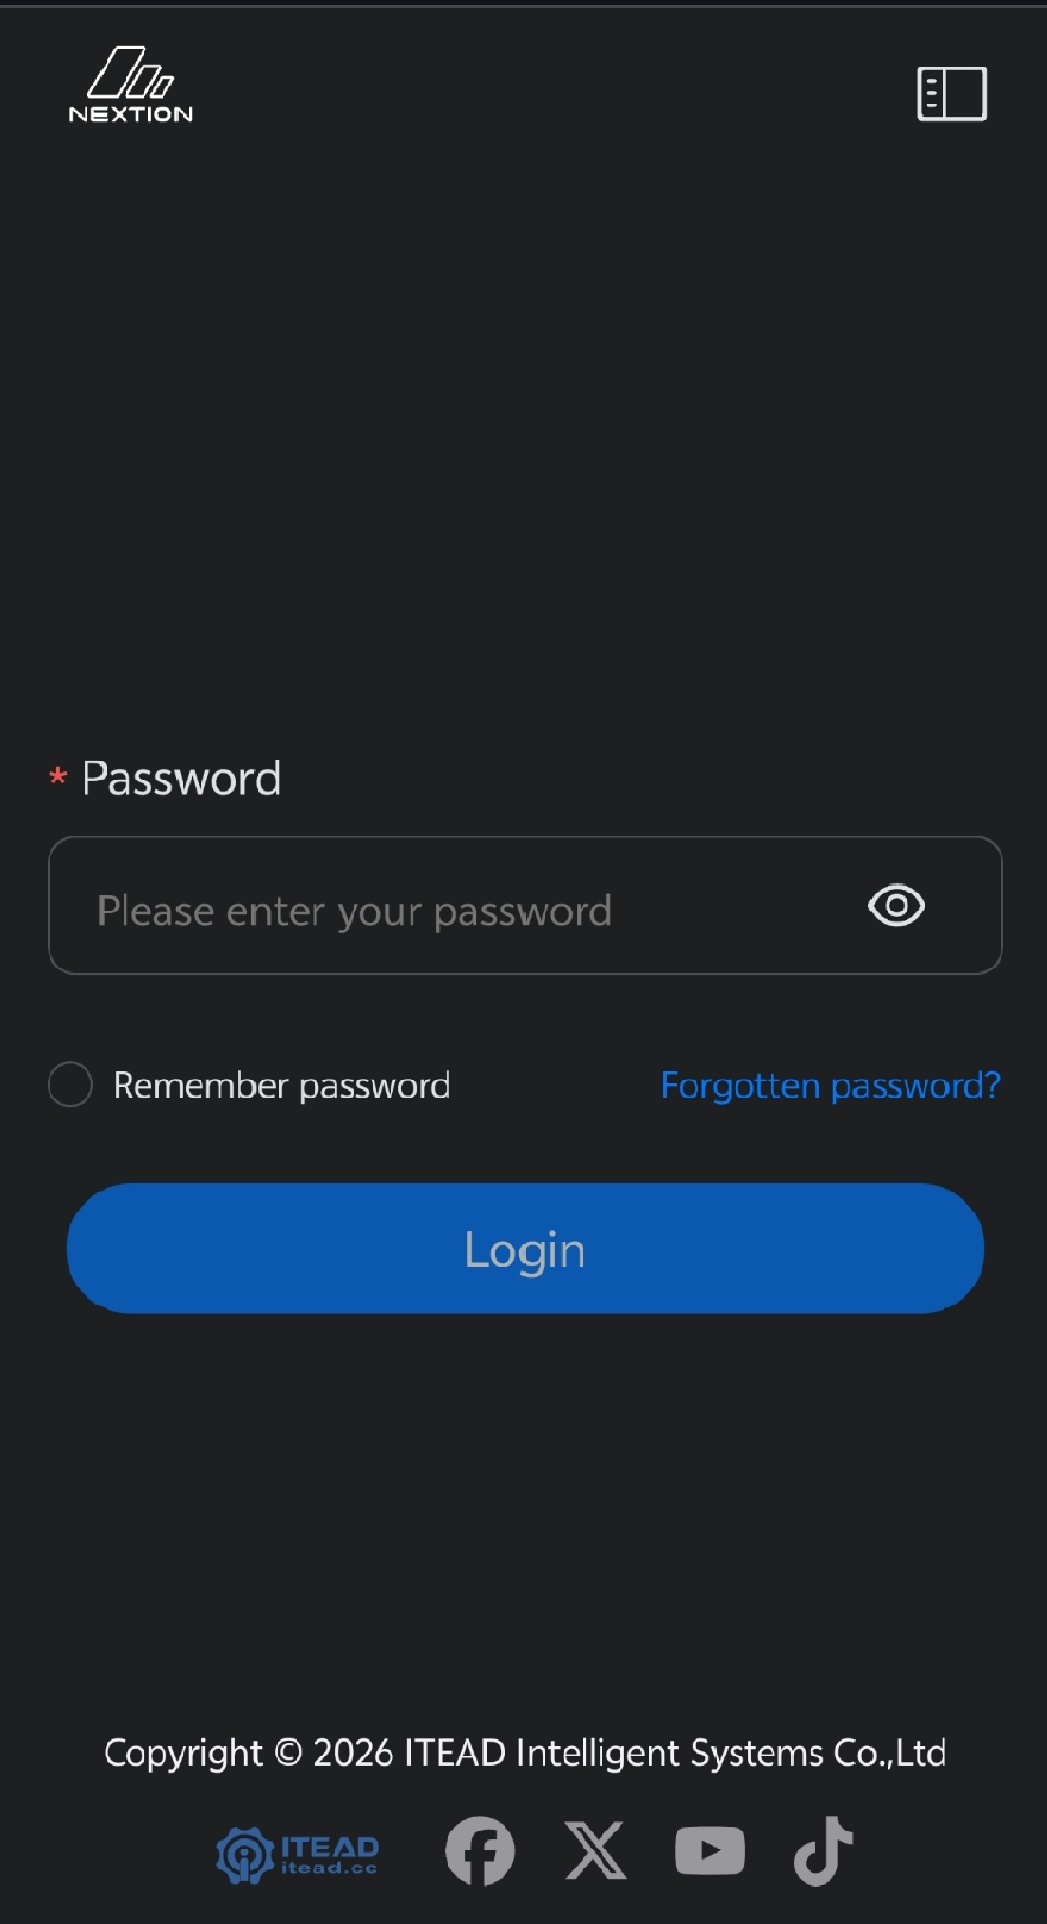
- The first time you open the Web Console, enter the password you set earlier to sign in.
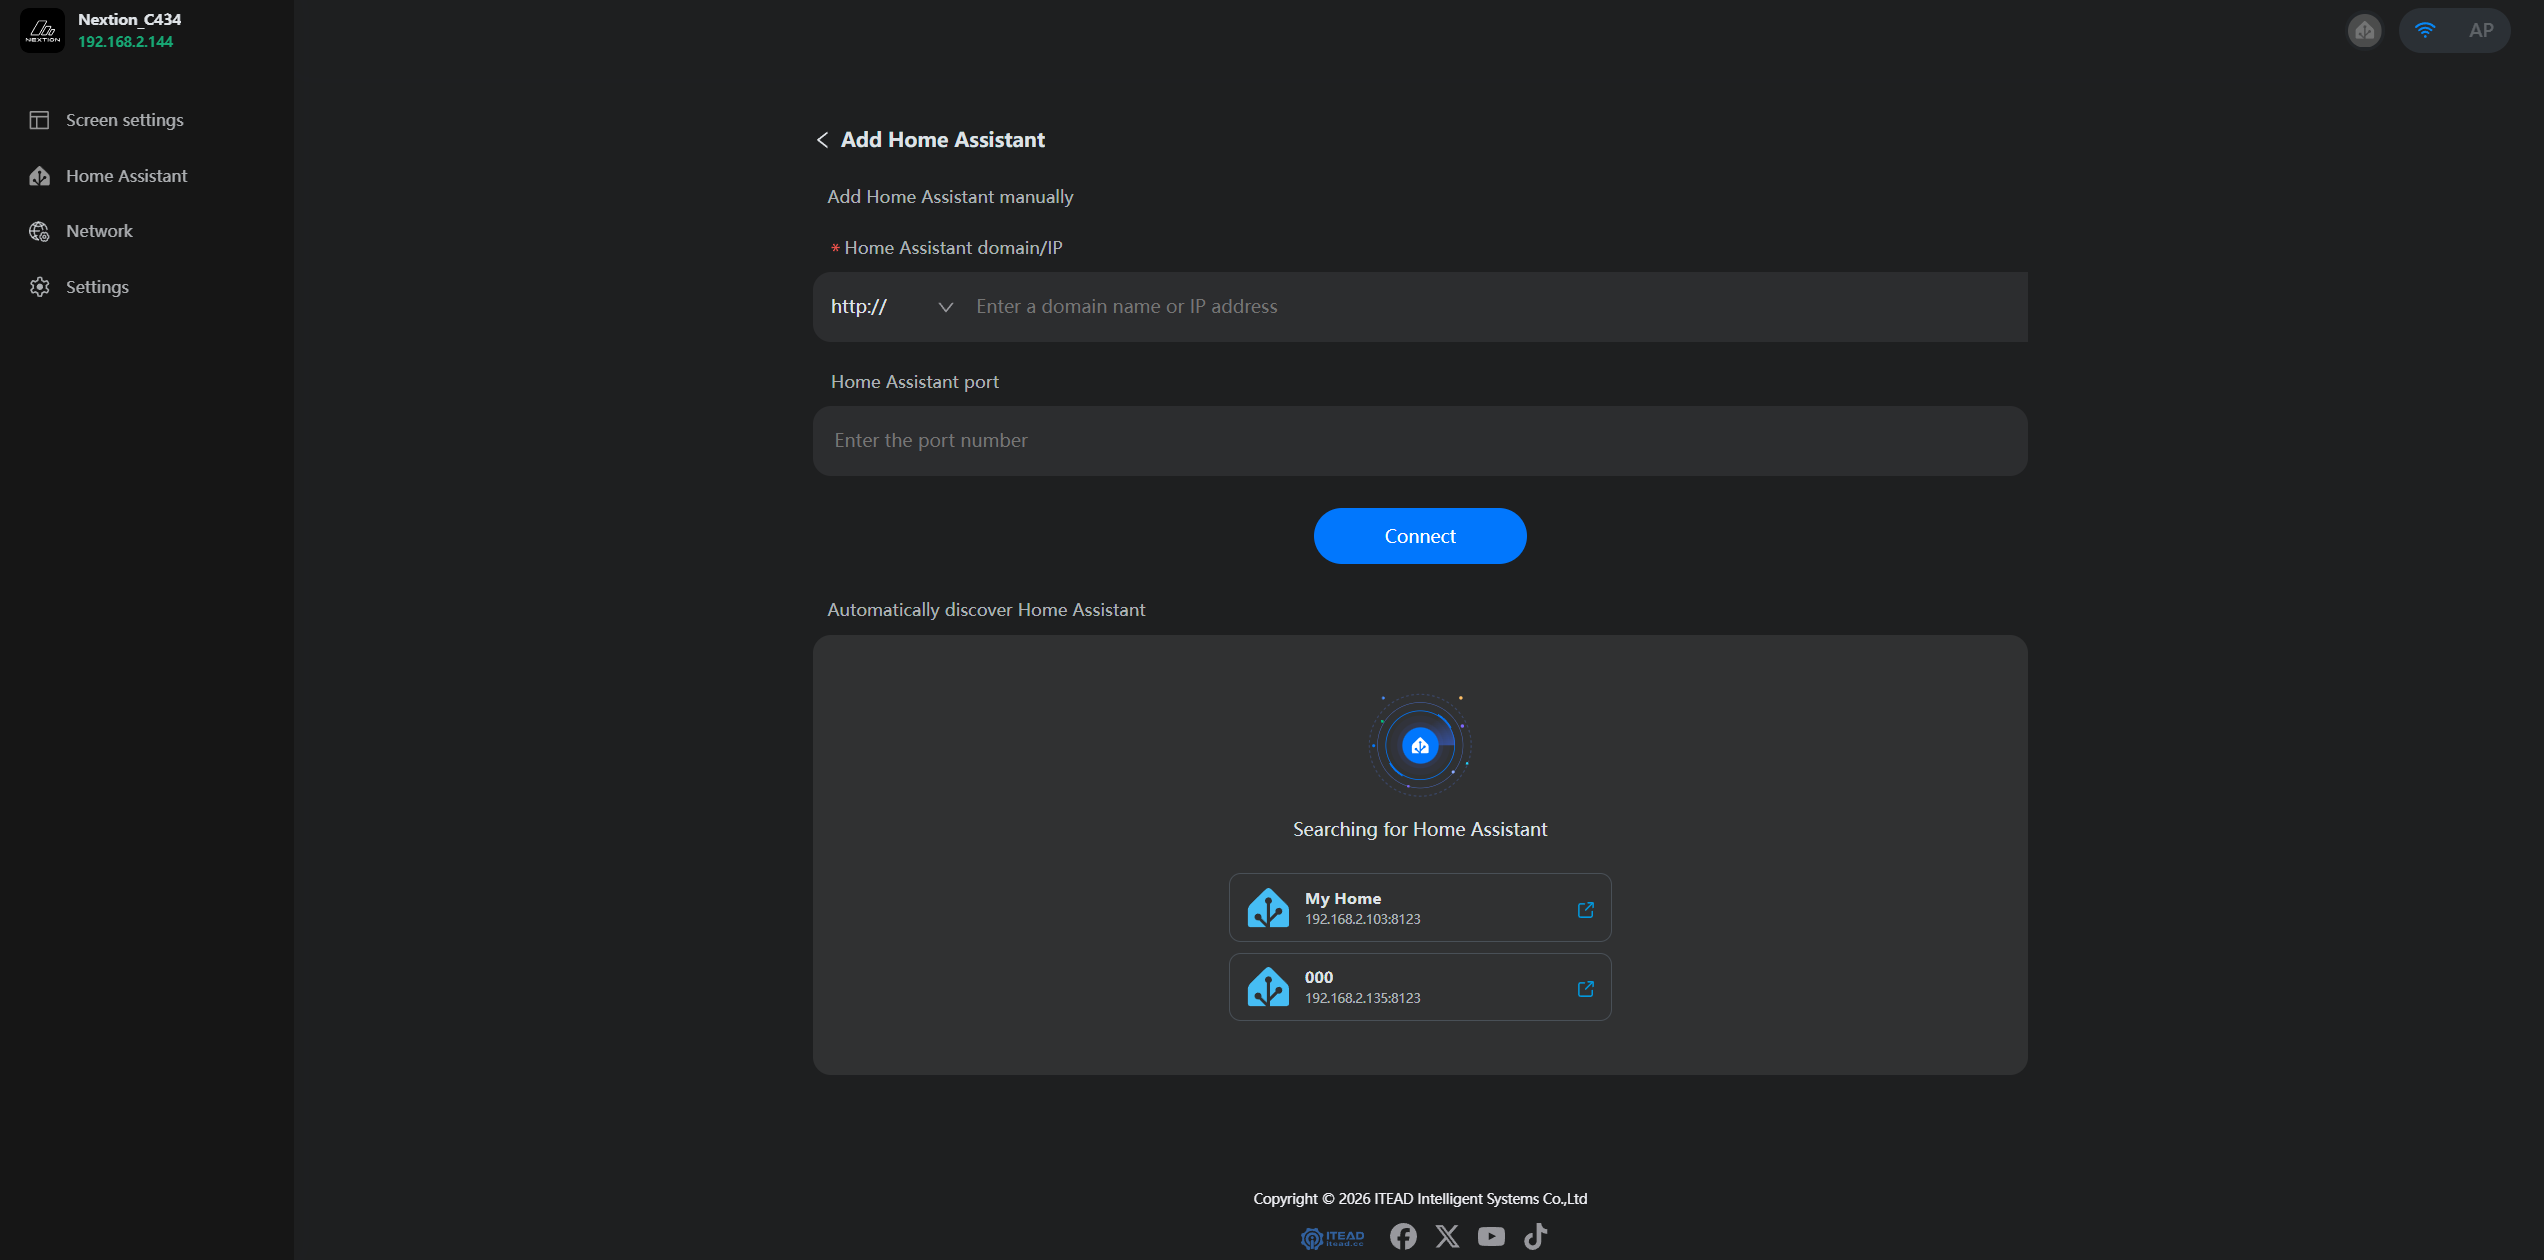
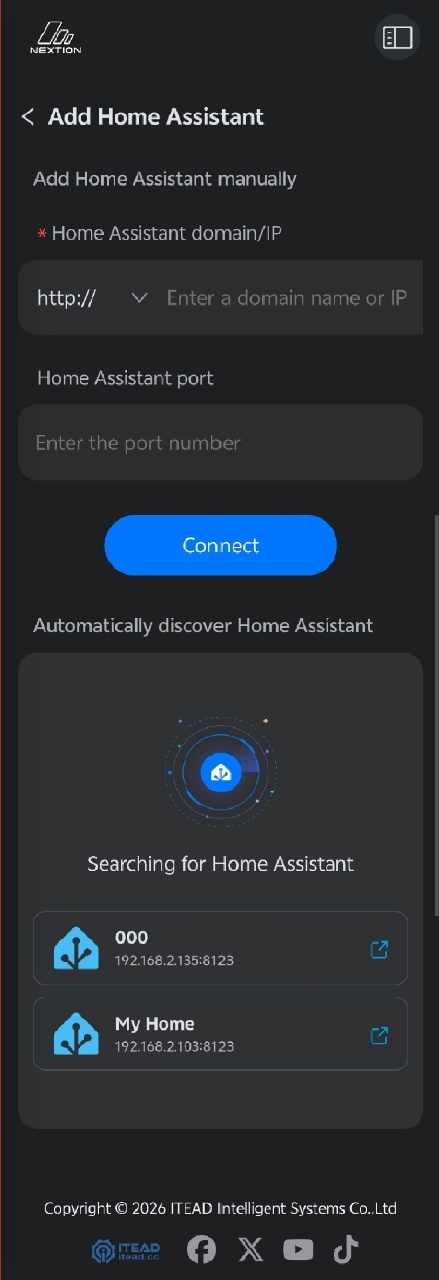
- The configuration page opens on the Home Assistant setup page. Select “Add Home Assistant” and follow the prompts to authorize Home Assistant. Confirm that the connection is working.
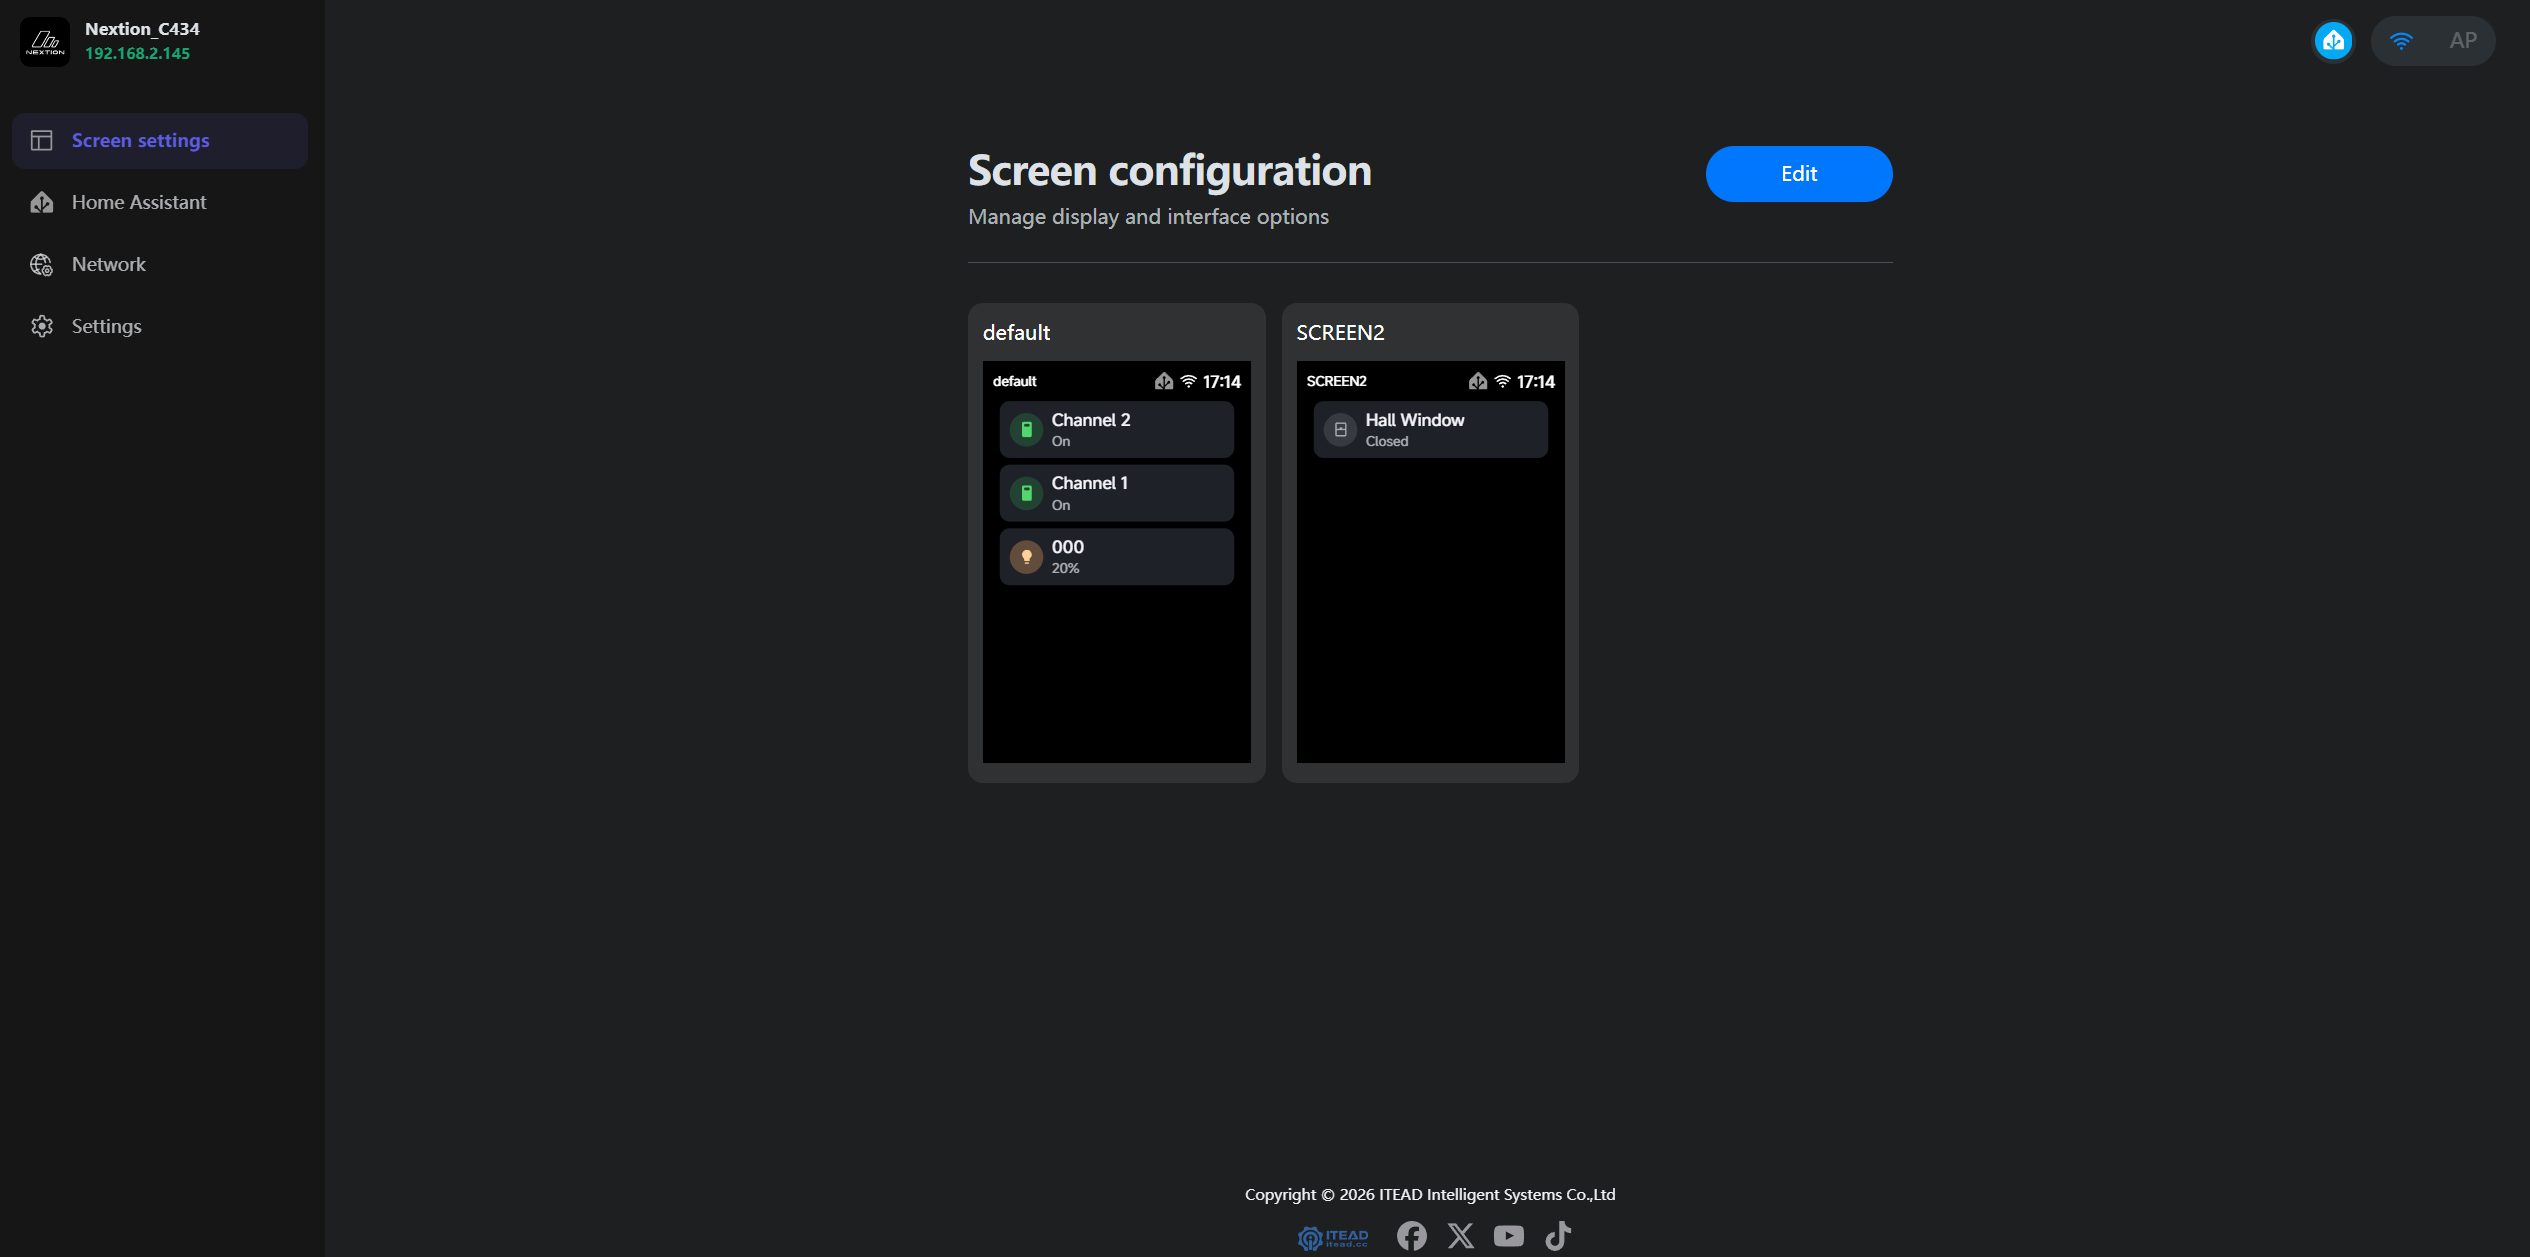
- Once Home Assistant is connected, open Screen Settings. You can add, rename, reorder, or delete screen pages, and add or remove entities synced from Home Assistant. Save your changes when finished.
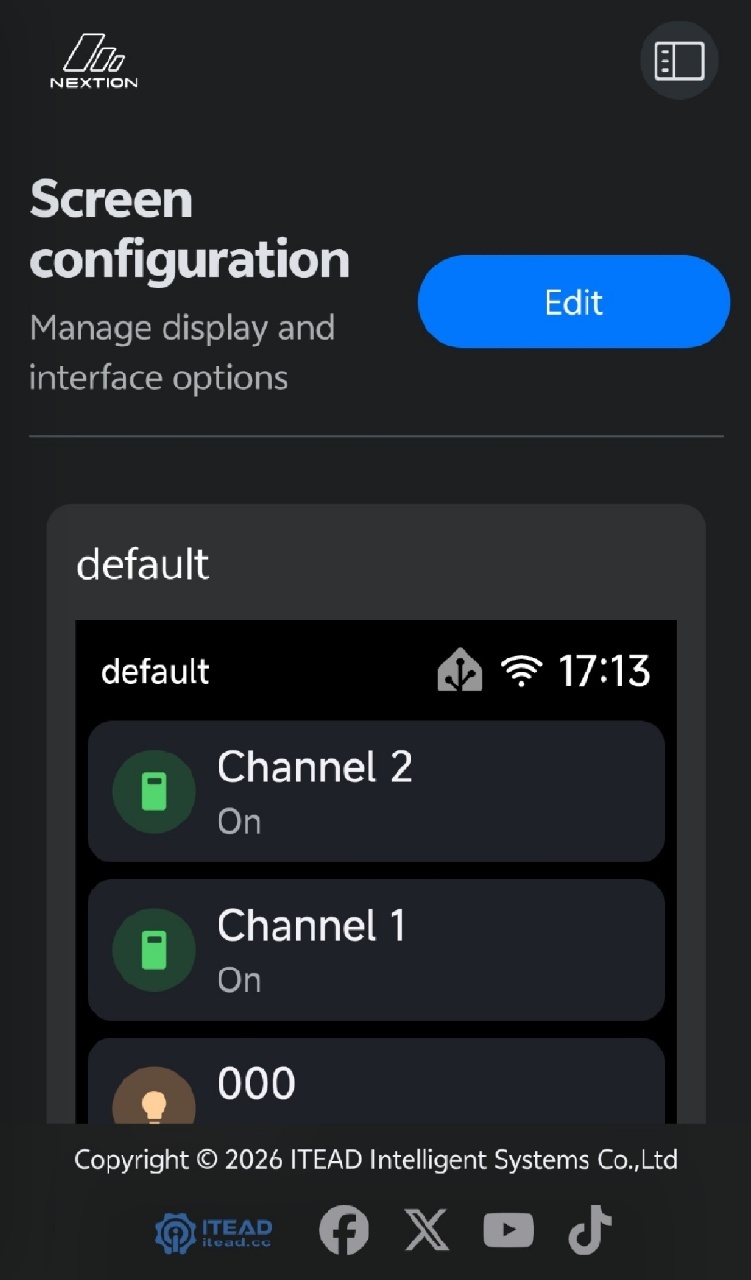
- After saving, you can interact with the device screen to control entities synced from Home Assistant.
2. Detailed User Guide
Before You Begin
- One ONX3248G035 3.5-inch display
- The name and password of an available 2.4 GHz Wi-Fi network
- An accessible Home Assistant instance
- A Wi-Fi-capable phone or computer
2.1 Set a Password
- After connecting to the device hotspot, open the password setup page. Set the device login password and enter it again to confirm.
- The password must be at least 8 characters long and contain both letters and numbers.
2.2 Configure Wi-Fi
- After setting the password, the Wi-Fi setup page opens.
- The page lists detected 2.4 GHz Wi-Fi networks. Select Refresh to scan again.
- If your network is not listed, select
Add WiFi manuallyto add it manually. - Select the Wi-Fi network, enter its password, and connect.
- After the device connects successfully, a dialog displays its assigned IP address and domain name.
2.3 Sign In
- The first time you open the Web Console in a browser, enter the device password to sign in.
- You can select “Remember password.”
- If you forget the password, select “Forgot password?” and follow the instructions in the Web Console and on the device screen to reset it, then sign in again.
2.4 Authorize Home Assistant
- Open the device configuration page. The Home Assistant page appears by default. Select “Add Home Assistant.”
- Manual setup: Enter the Home Assistant domain name or IP address and port. If Home Assistant and the device are on the same local network, selecting Connect opens the Home Assistant sign-in page.
- Automatic discovery: The page continuously searches for Home Assistant instances on the local network. Wait for an instance to appear, then select it to open its sign-in page.
- Enter valid Home Assistant credentials. Home Assistant then redirects you to the device configuration page.
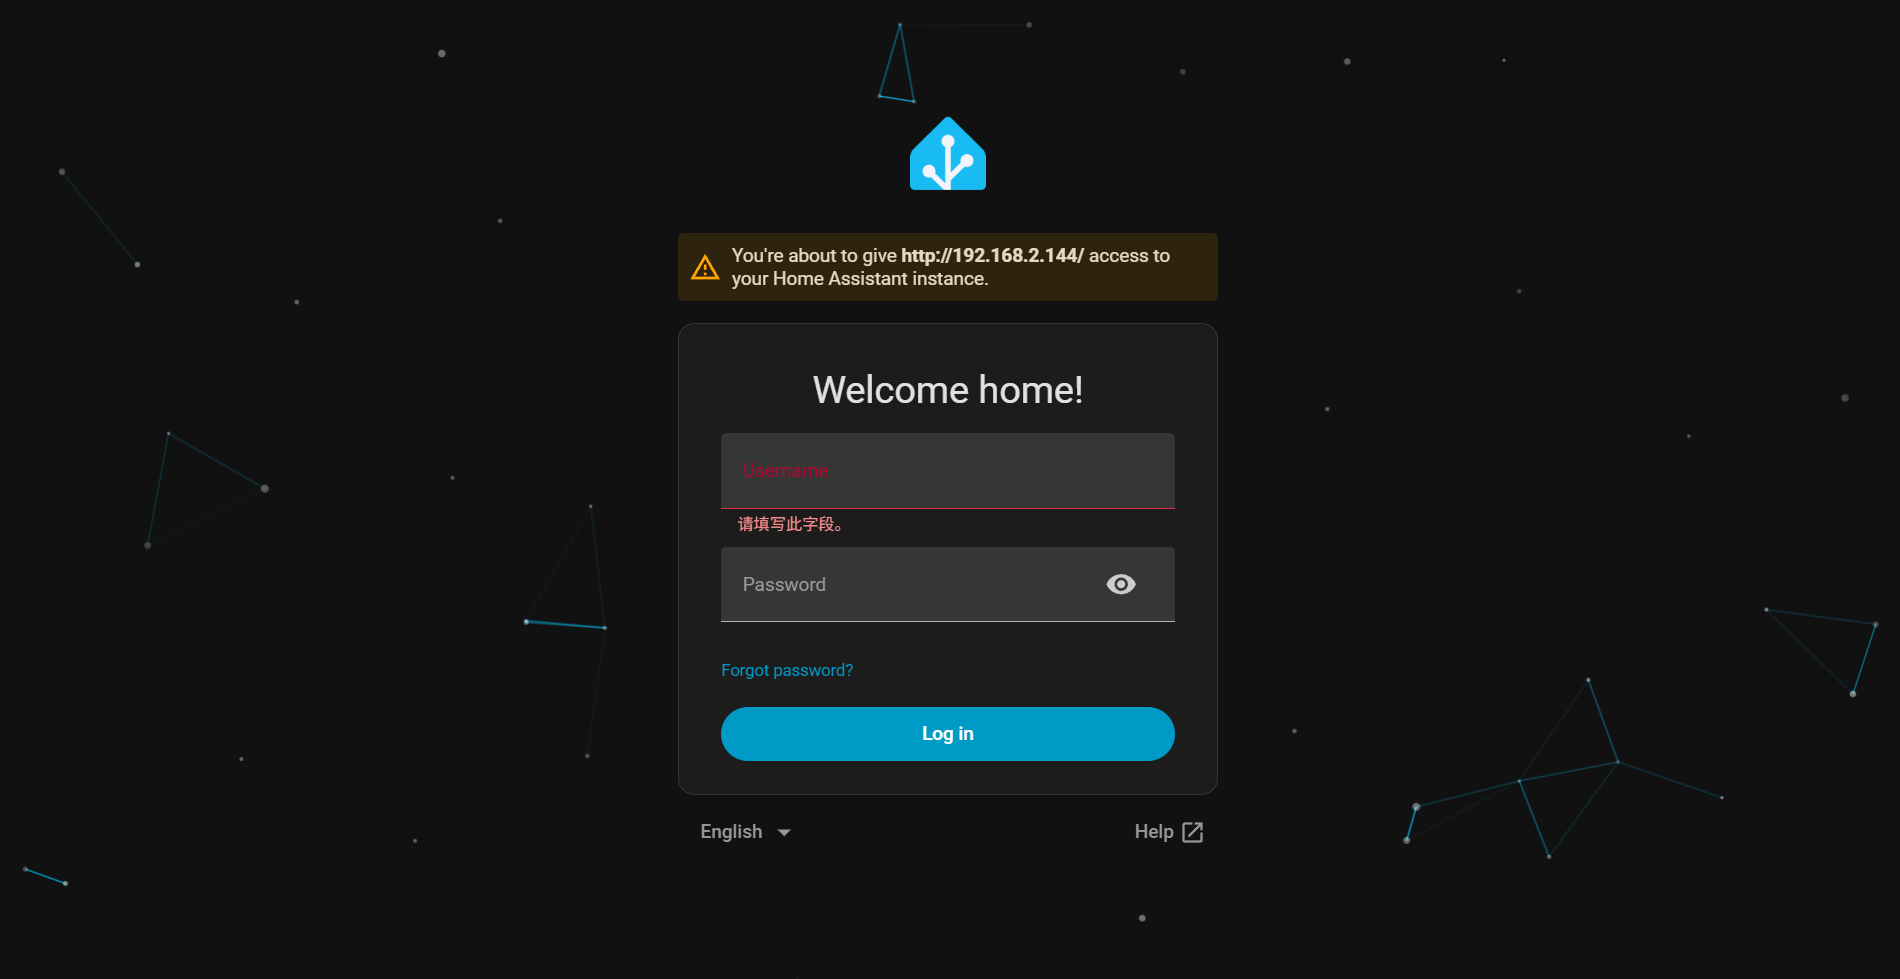
- Wait briefly while the device requests an authorization token from Home Assistant. When authorization succeeds, Home Assistant has been added.
2.5 Configure Screen Pages and Add Entities
- Screen pages cannot be edited until Home Assistant is connected. After connecting, select Edit to configure them.
- You can add screen pages, rename or delete them, and change their order.
- To add entities, select
Add Entity, load the Home Assistant entity list, and choose the entities to add.
2.6 Network Settings
2.6.1 AP Settings
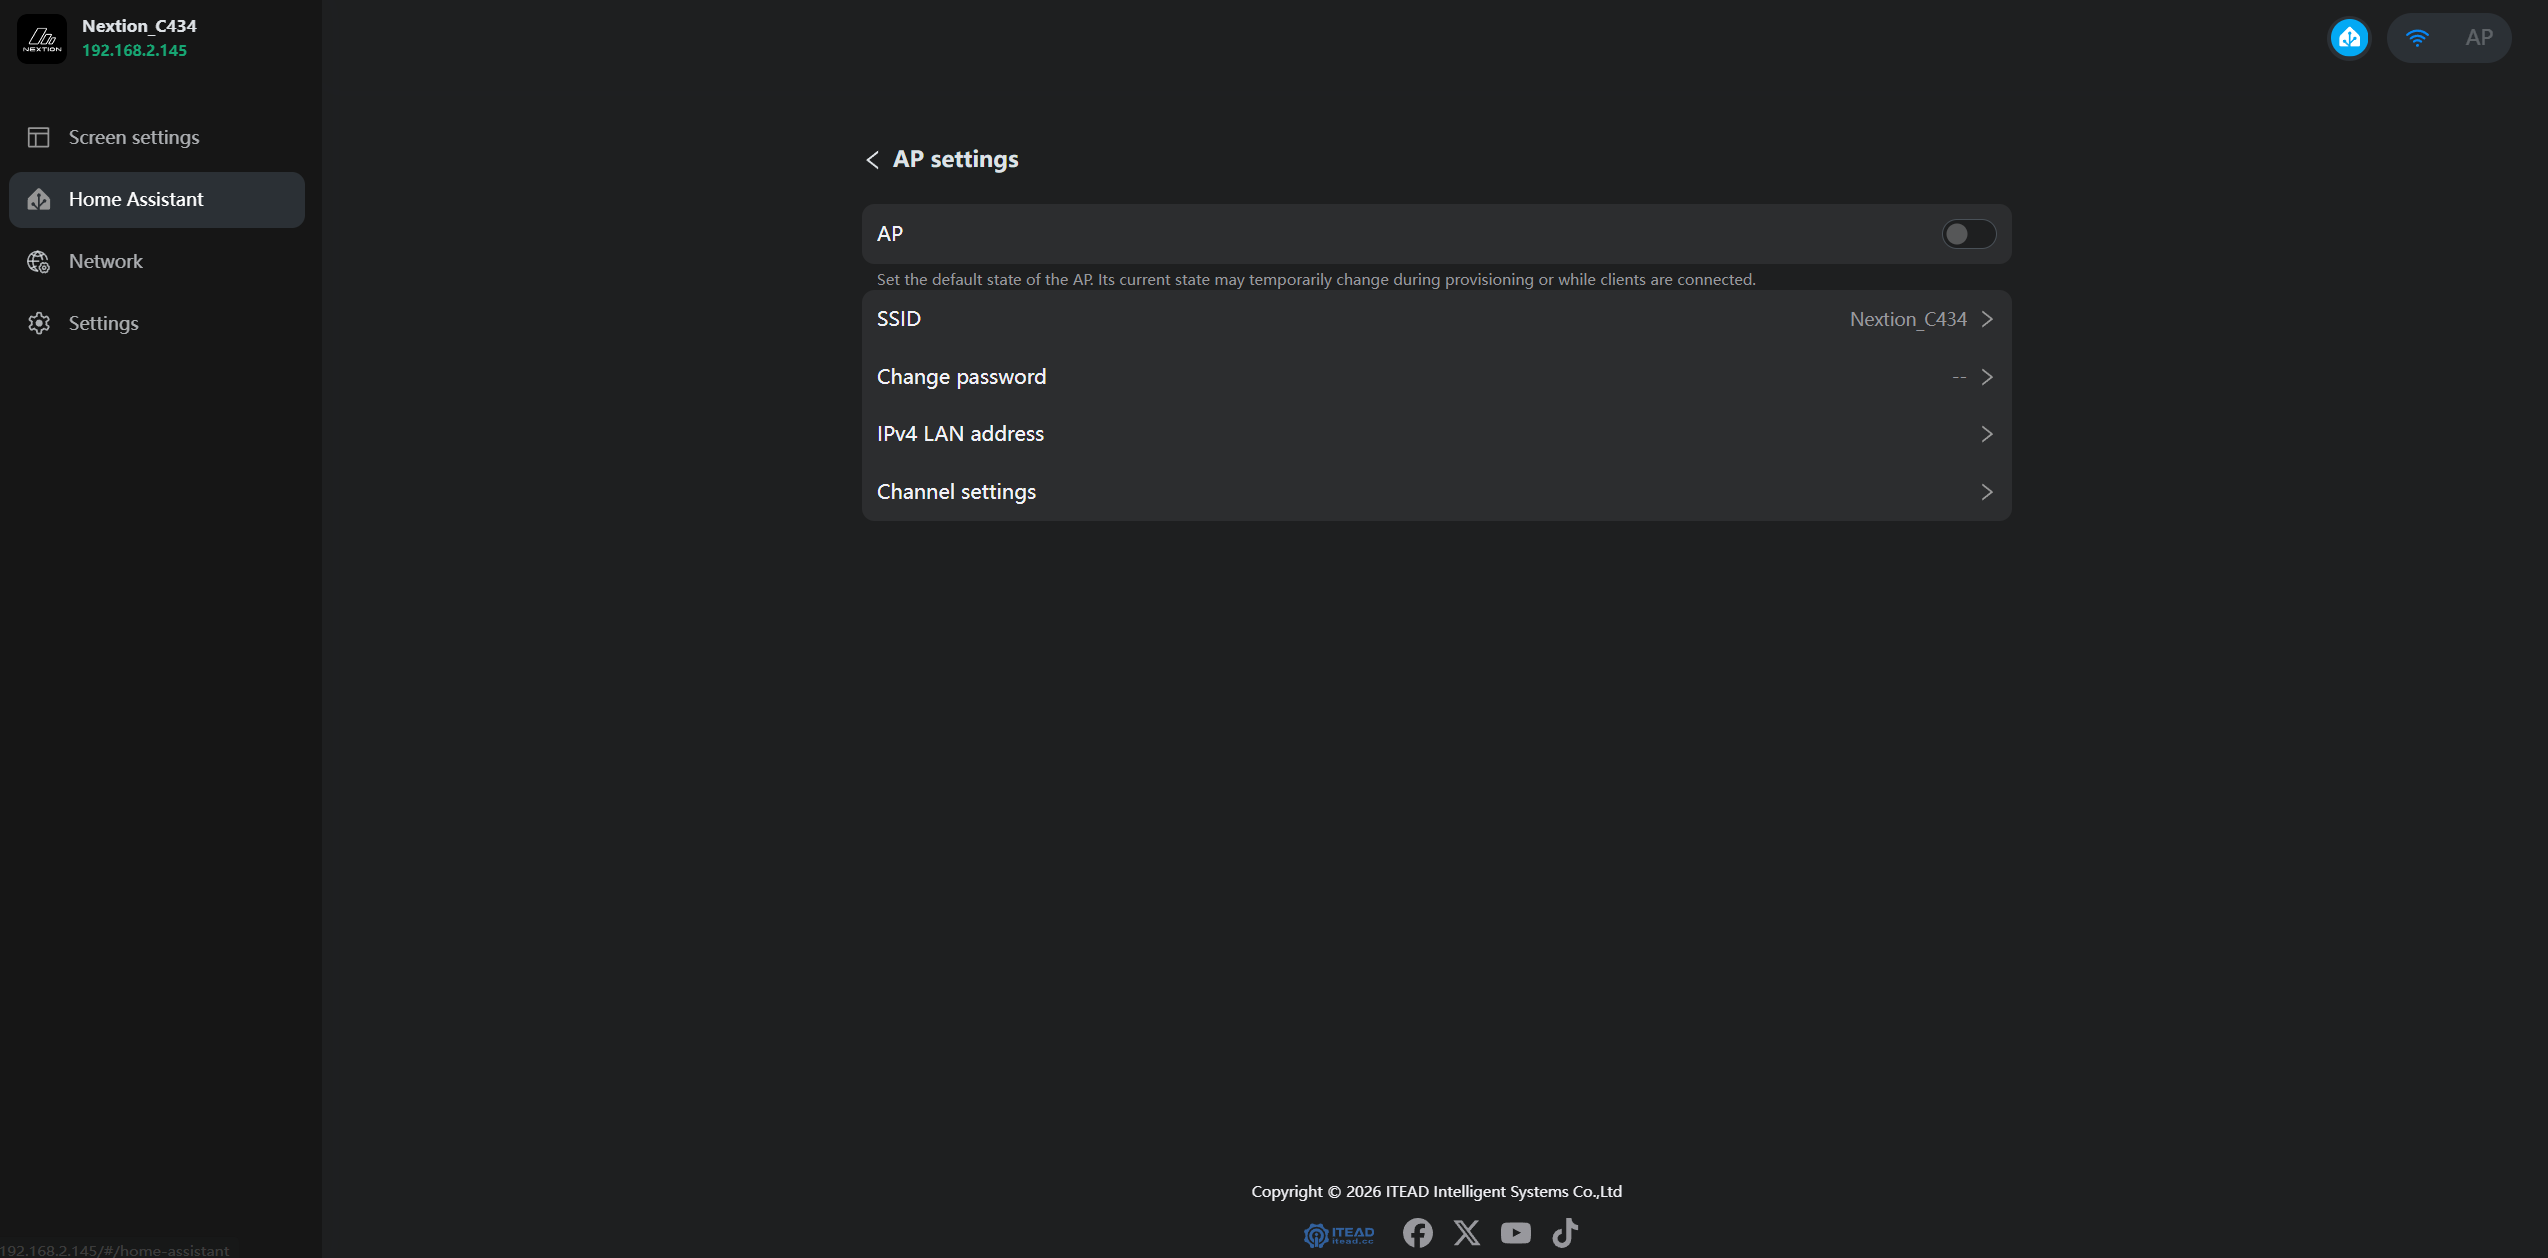
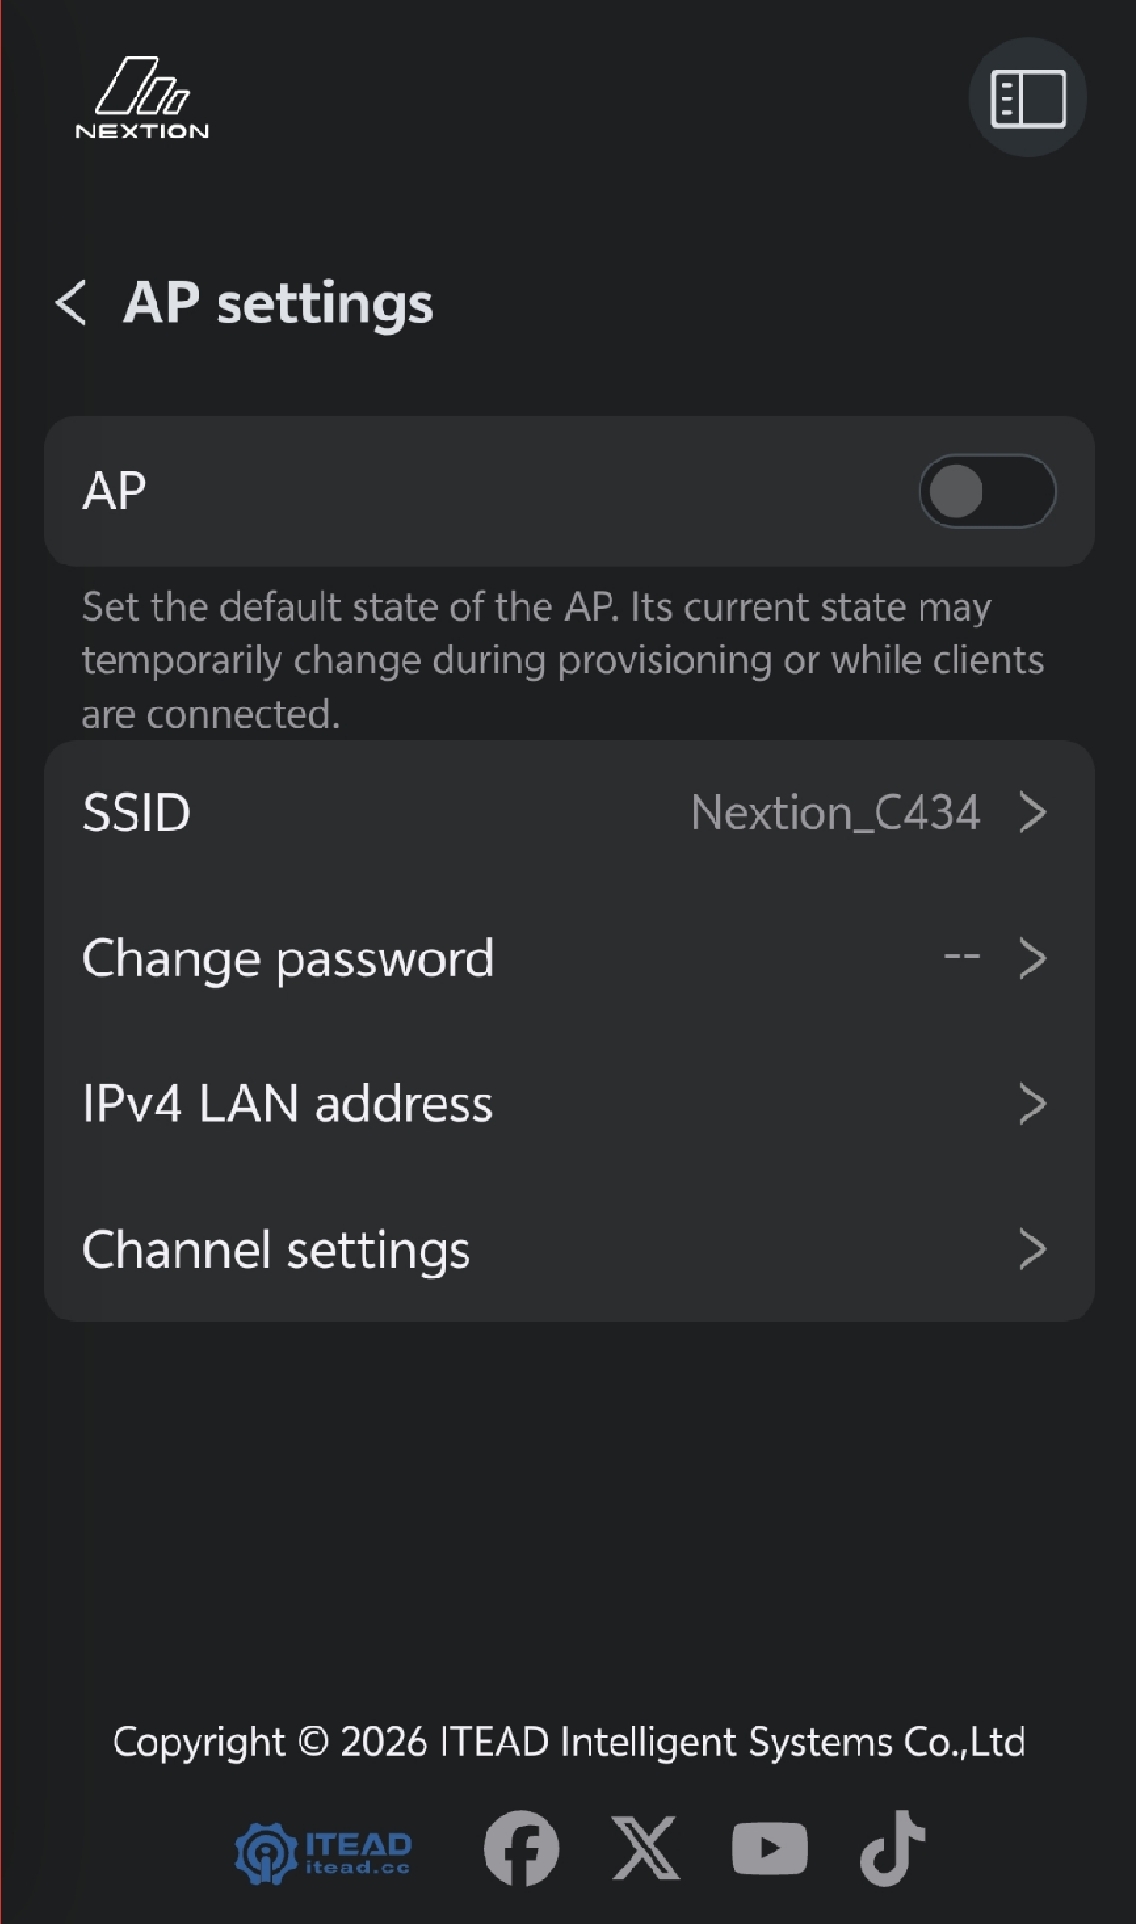
- Go to
Network > AP Settingsto change the hotspot name and password, IPv4 LAN address, and wireless channel.
2.6.2 WLAN Settings
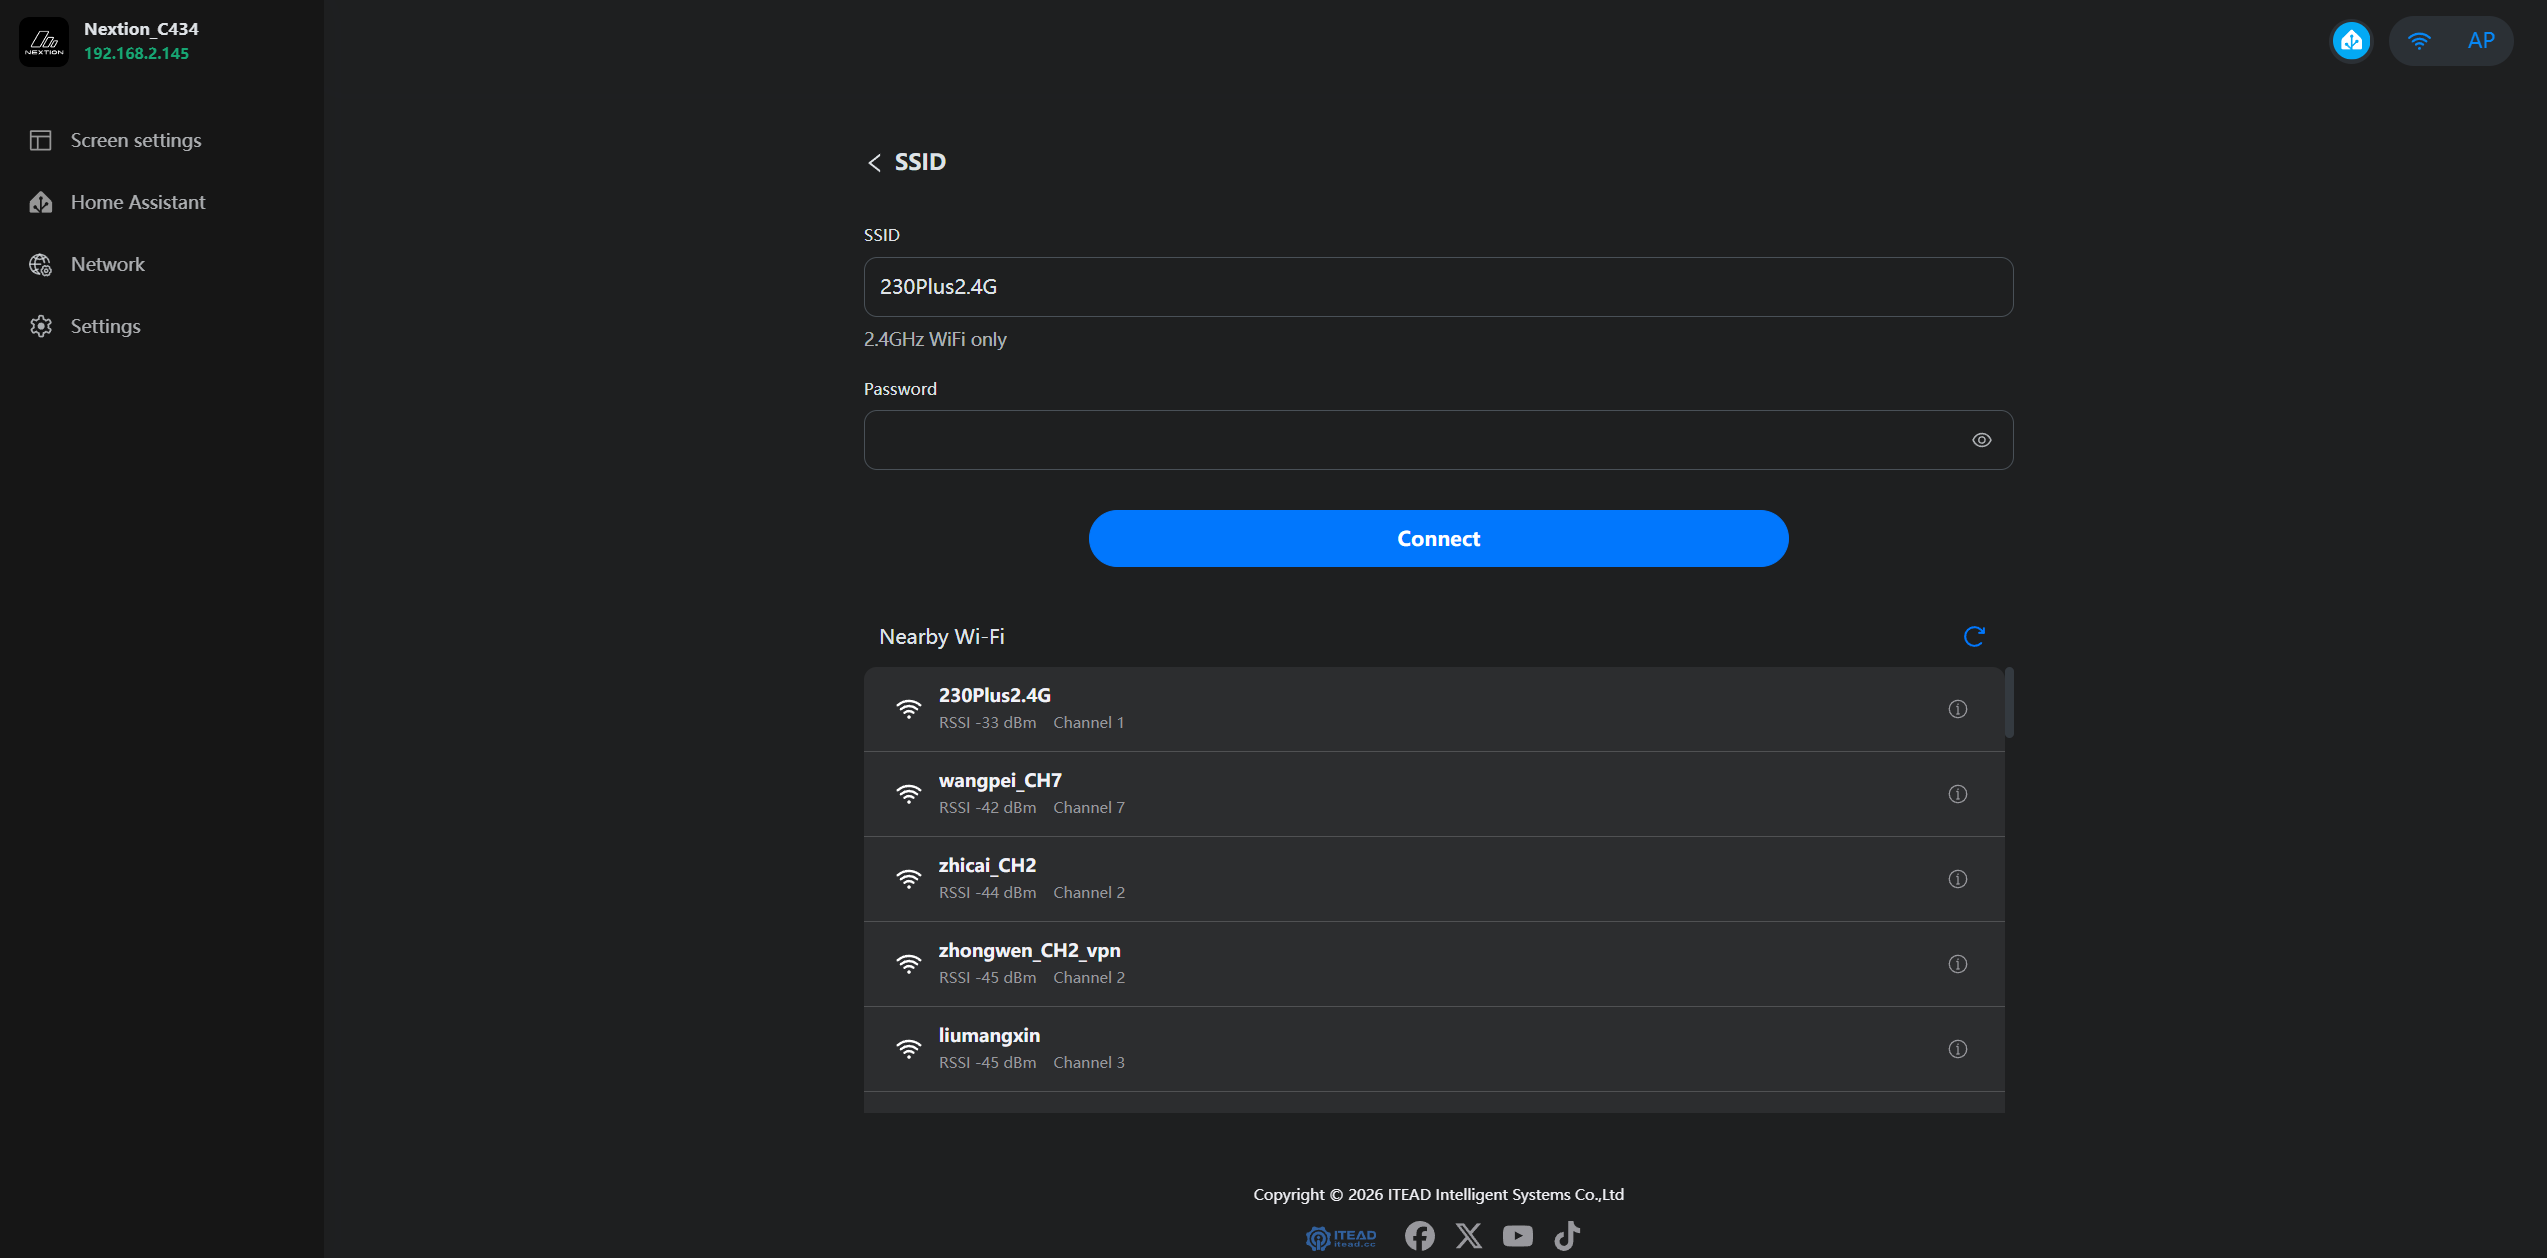
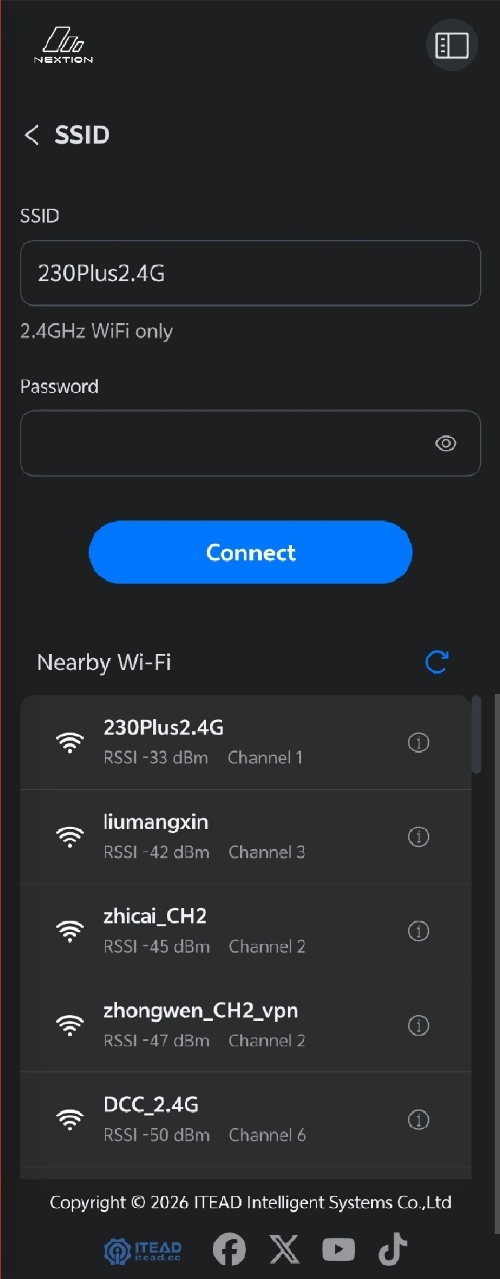
- Go to
Network > WLAN Settings > SSIDto switch Wi-Fi networks. - Note: Switching Wi-Fi changes the device IP address. If Home Assistant and the device are no longer on the same local network, the connection will be lost. When accessing the Web Console by IP address, the phone or computer must also be connected to the corresponding Wi-Fi network.
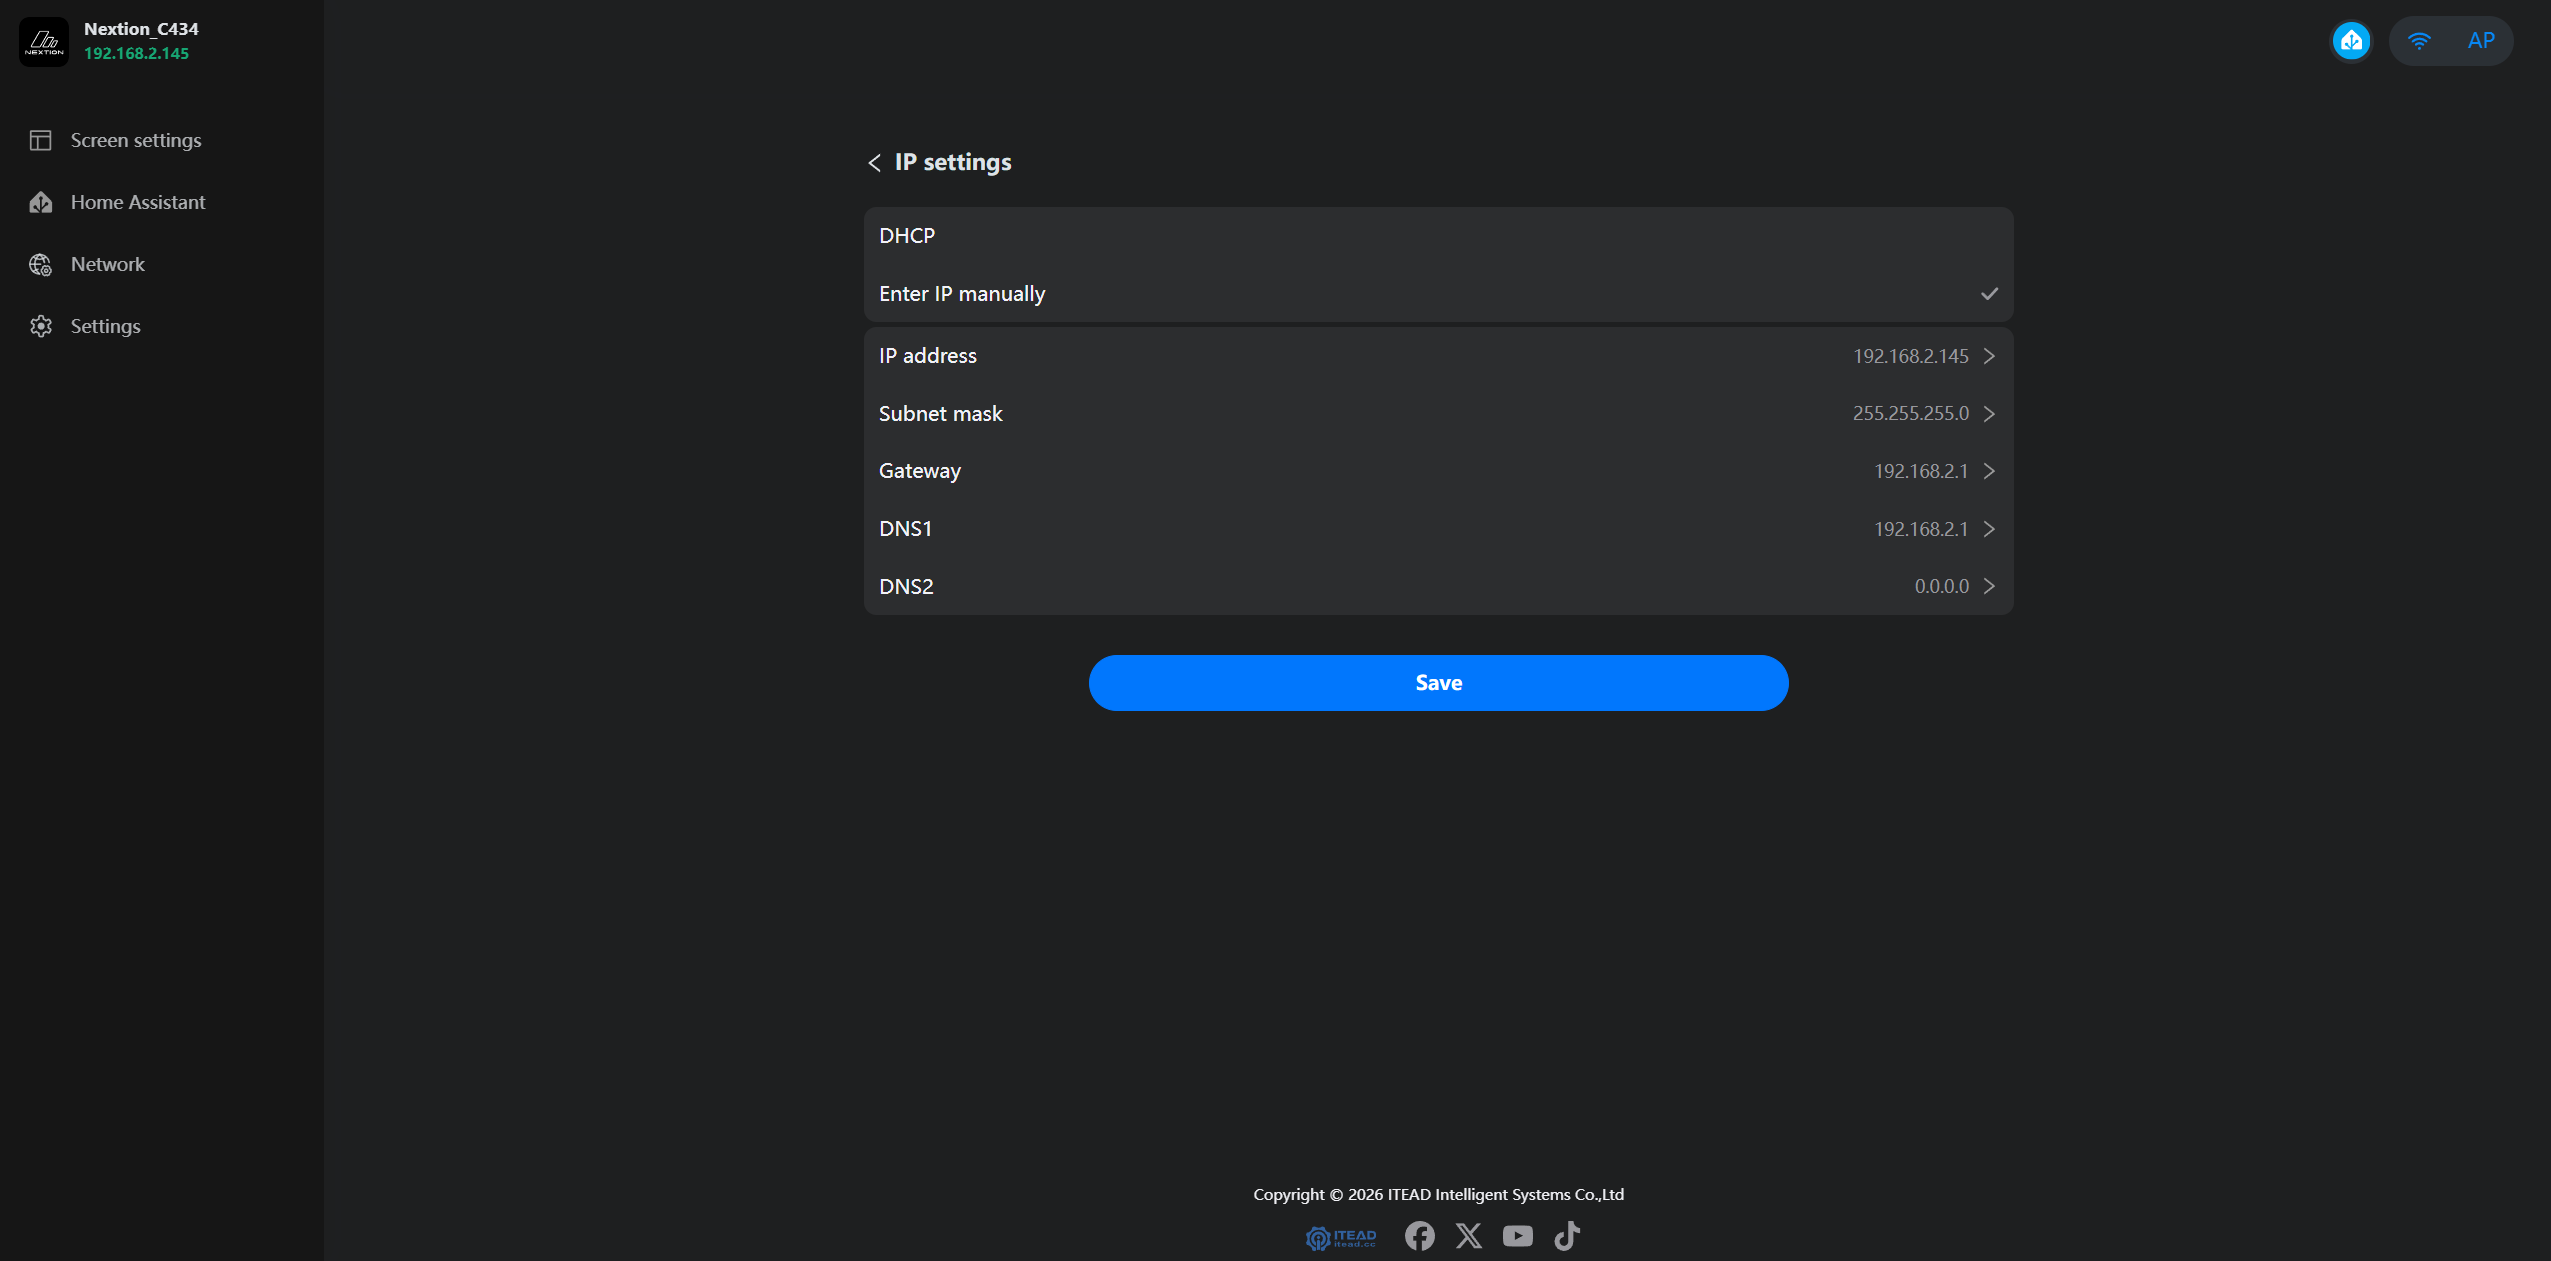
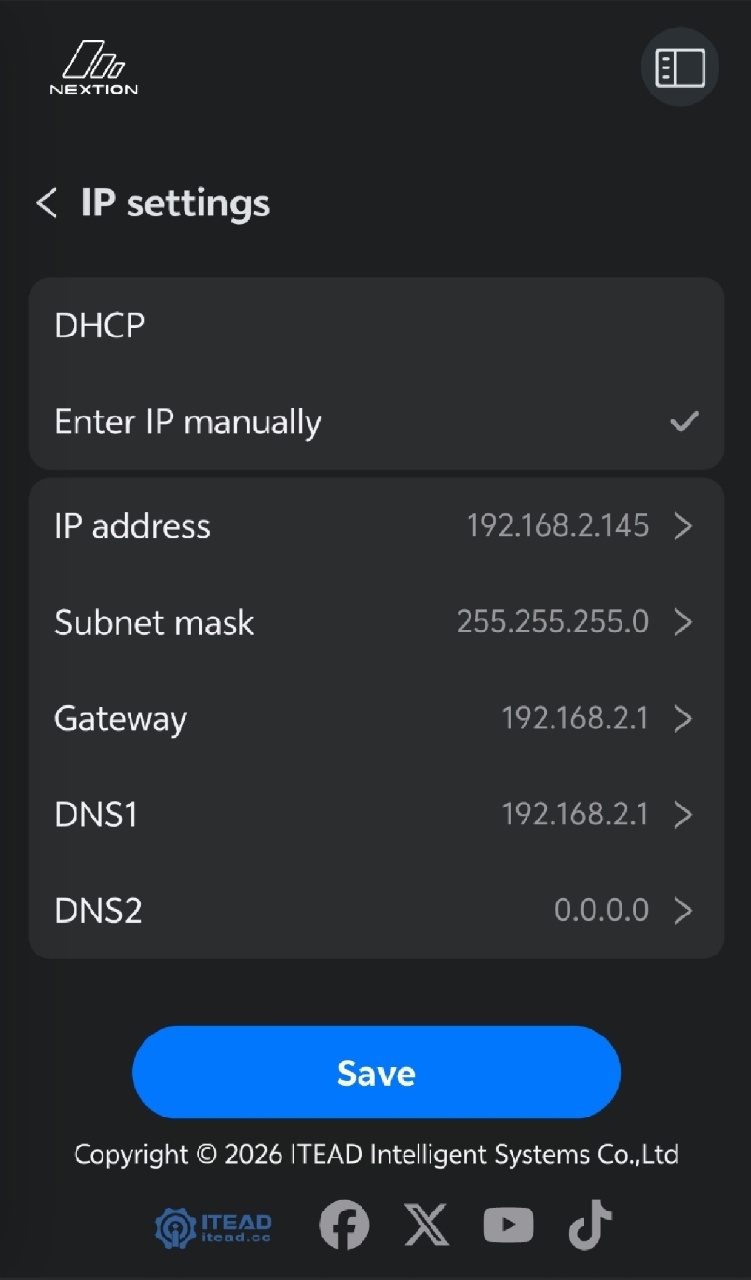
- Go to
Network > WLAN Settings > IP Settingsto obtain an IP address automatically or configure a static IP address manually.
2.7 Device Settings
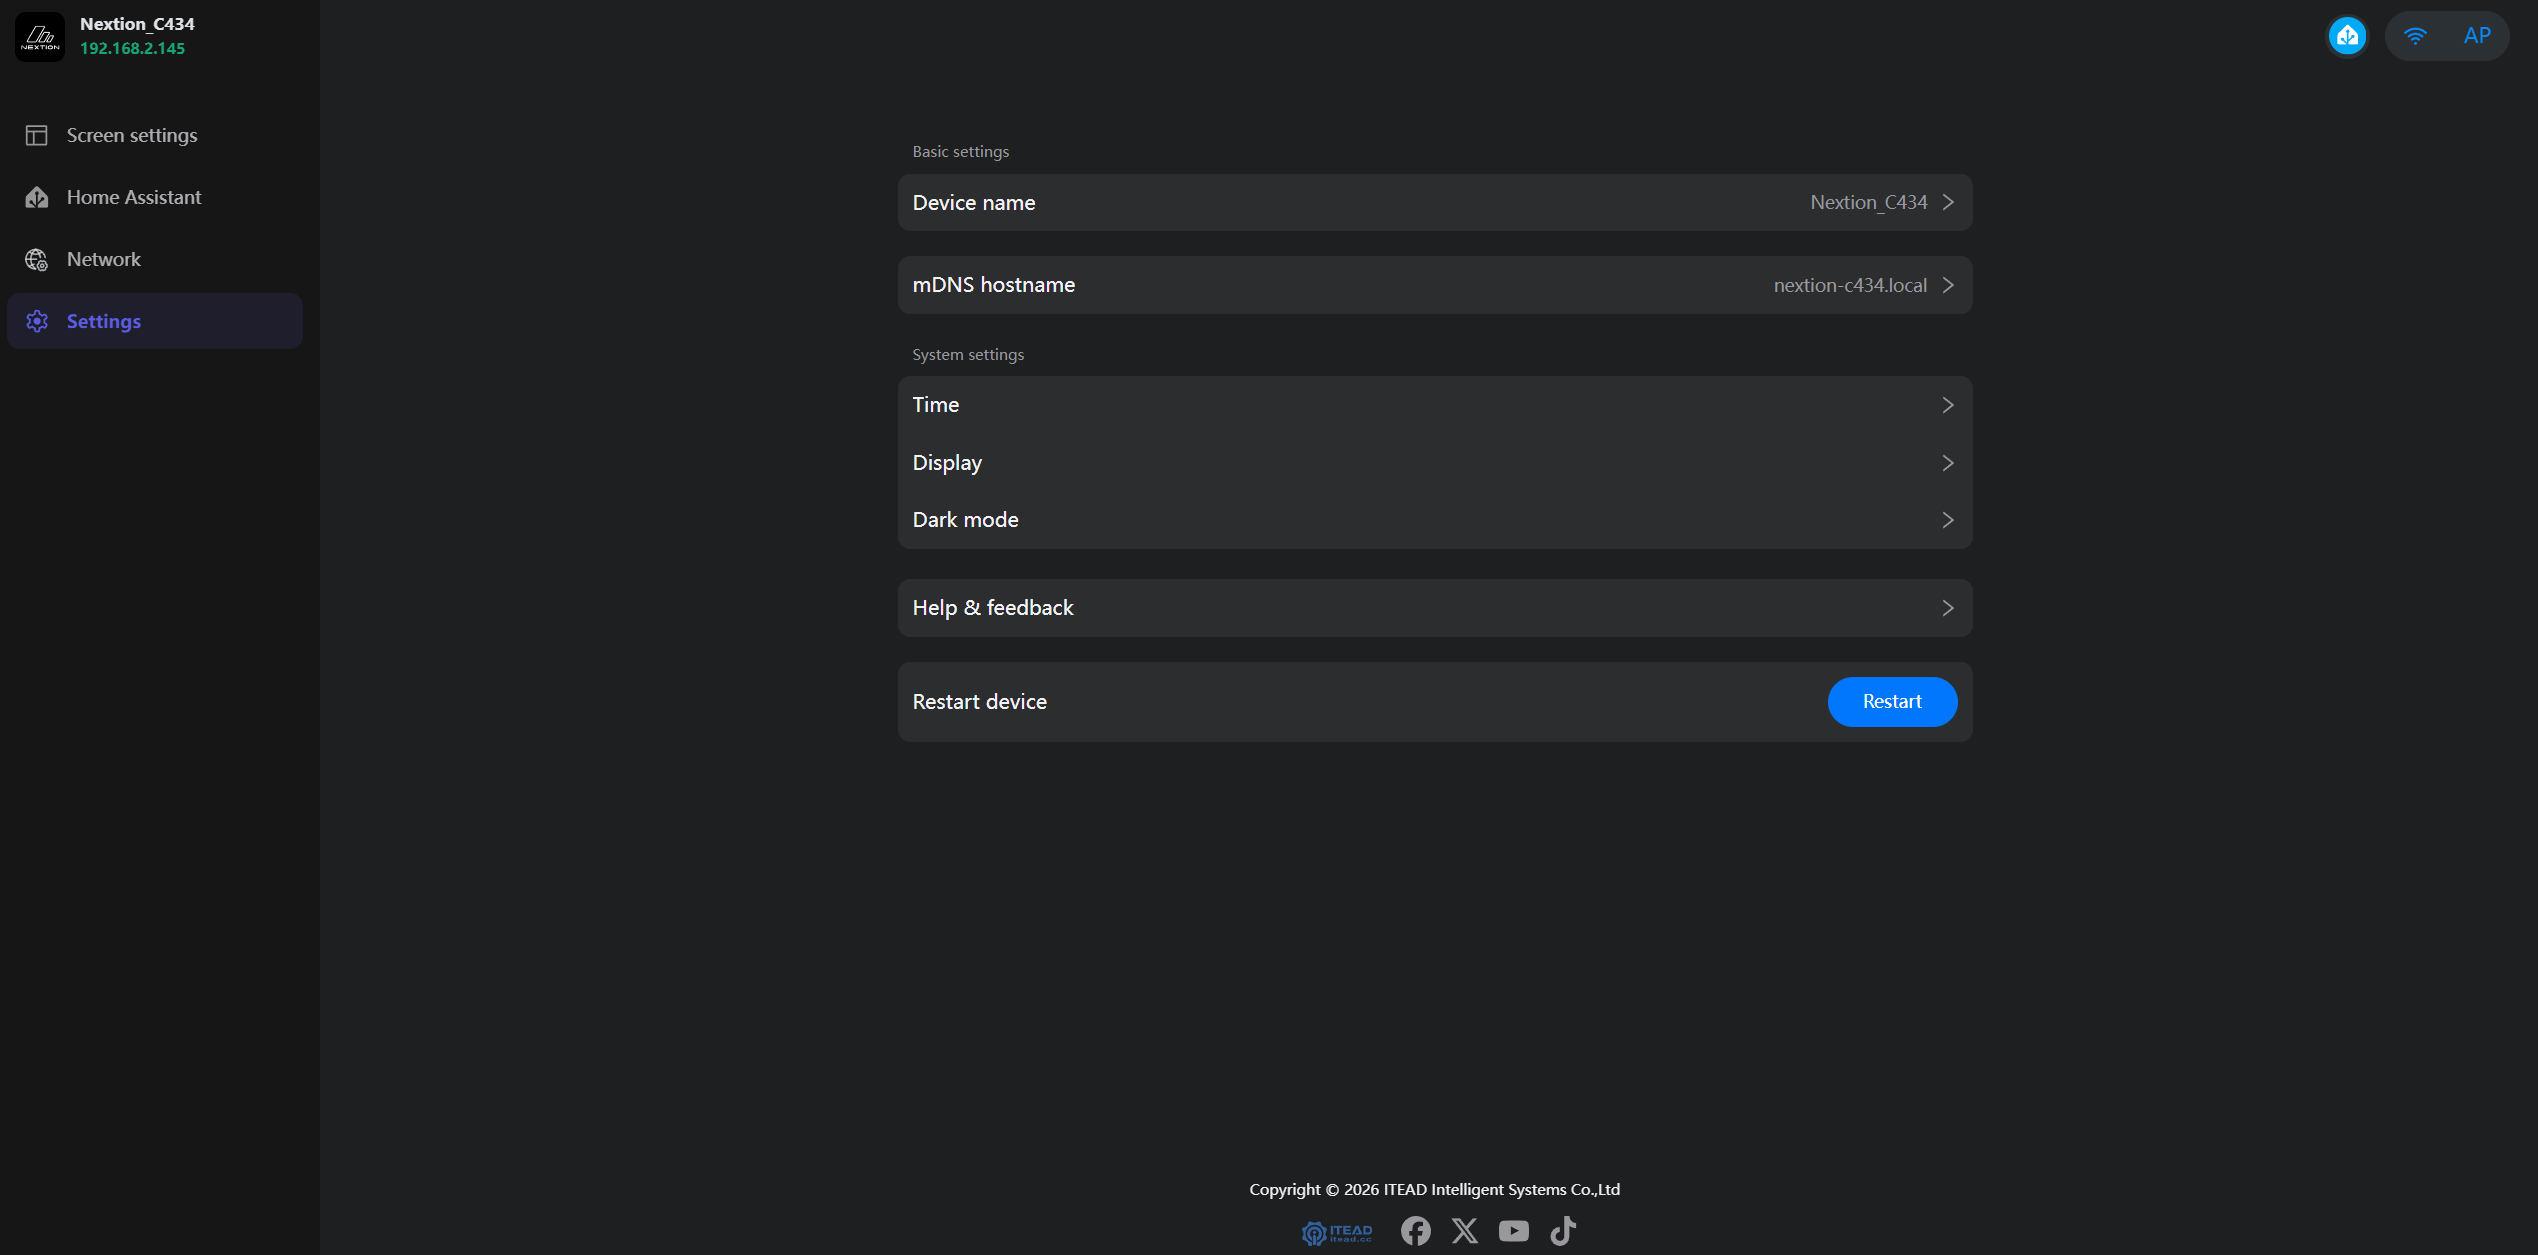
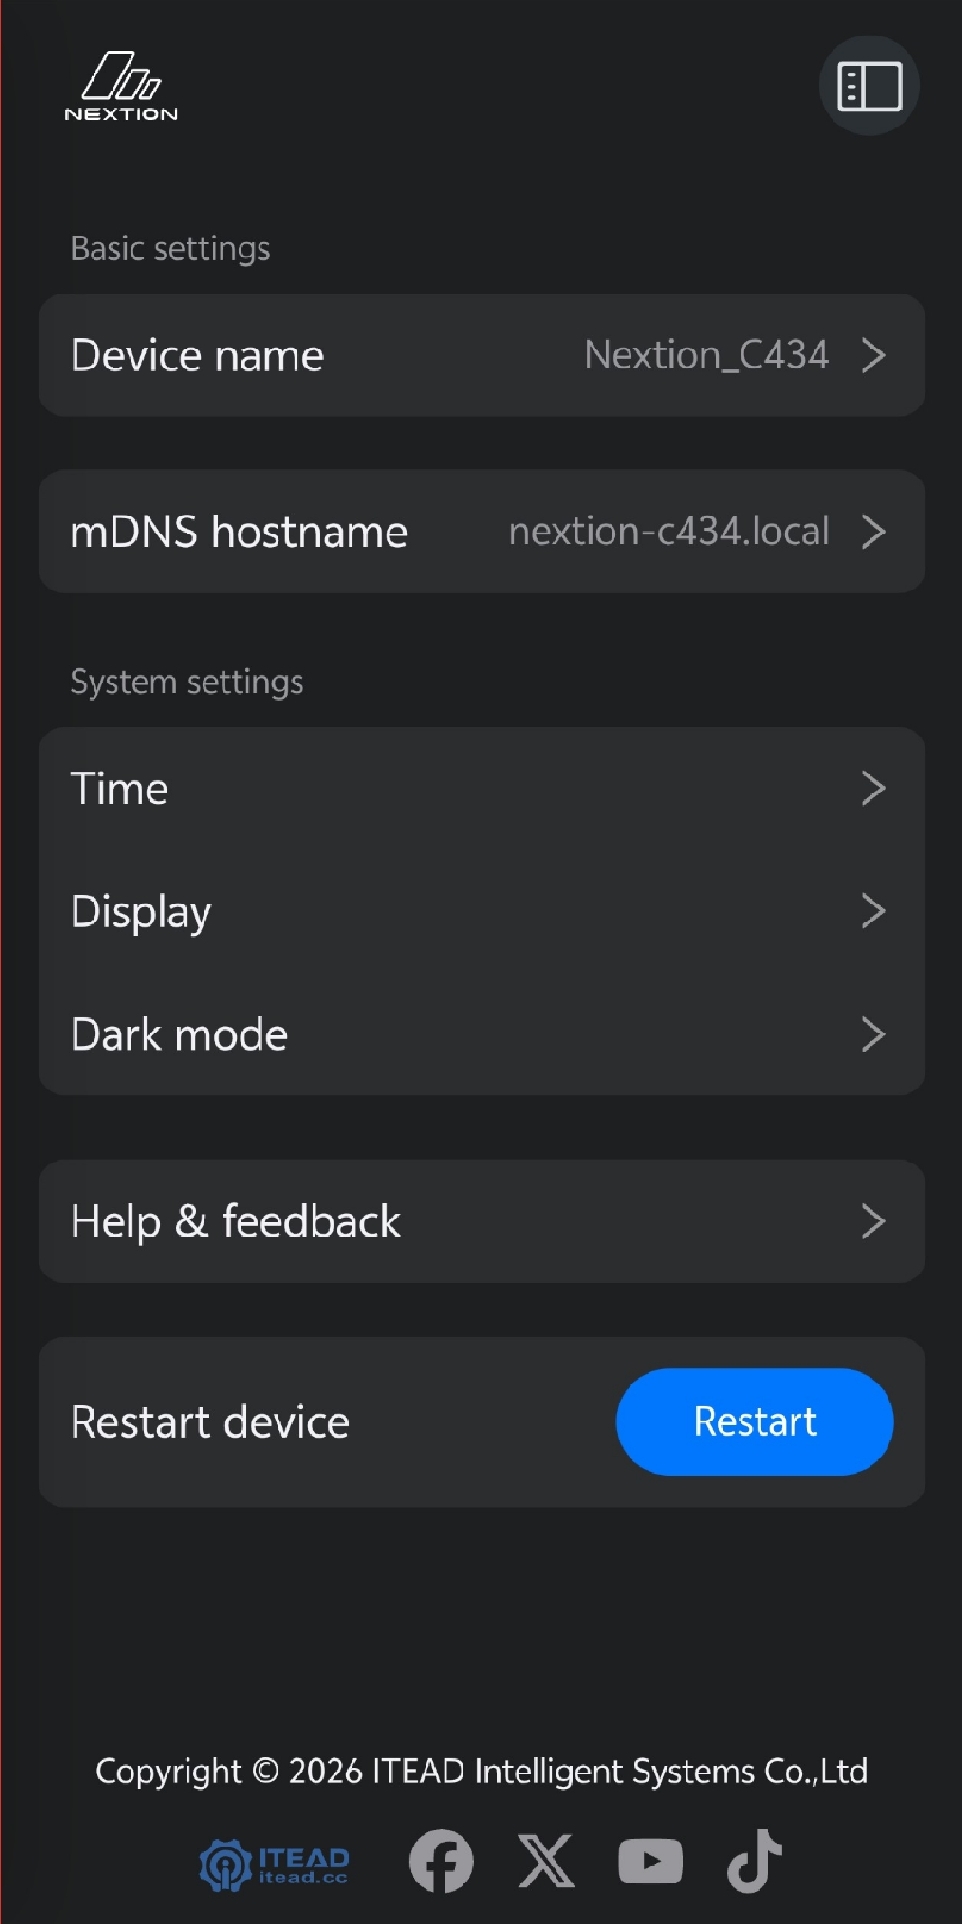
Select Settings from the menu on the left:
- Change the device name.
- Change the mDNS hostname. It must end in
.local. - Change the current time zone. Select “Auto Detect” to detect your time zone and display the local time.
- Display settings: adjust the screen brightness, enable or disable screen lock, and set the auto-lock timeout.
- Restart the device.
2.8 OTA Updates
- Manual check: Swipe down on the device screen to open the device information page, then select “Check for Updates” to check whether the latest version is installed.
- Automatic check: The device automatically checks for new firmware during startup, around midnight, and whenever Wi-Fi is changed or reconnected.
- The device screen and Web Console cannot be used while an update is in progress.
- If power is lost during an update, the update cannot be resumed from where it stopped.
- If a firmware update fails, try again.
3. FAQ
3.1 Home Assistant Statuses
The highlighted area below shows the Home Assistant status. There are four possible states:
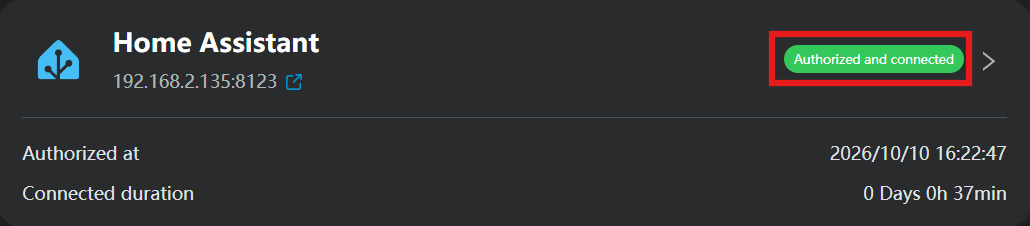
- Authorized and connected.
- Authorized, device disconnected: The Home Assistant connection was manually disconnected from the Edit Home Assistant page. Select Connect to restore the connection.
- Authorized, connection lost: The Home Assistant connection ended unexpectedly. Common causes include Home Assistant stopping, becoming unavailable, or losing power while its settings are being saved, or Home Assistant and the device no longer being on the same local network. Reconnect after the Home Assistant service is available again.
- Authorization invalid: The long-lived access token was deleted in Home Assistant, expired, or otherwise became invalid.
3.2 Unable to Add Home Assistant Manually?
- Verify that the Home Assistant IP address or domain name and port are correct.
- Make sure Home Assistant and the device are on the same local network.
- Make sure the Home Assistant service is running properly.
3.3 Forgot Your Password?
- On the device sign-in page, select “Forgot password?”, then double-press the physical Boot button on the device within 10 seconds.
- After the double-press is recognized, the device screen starts a five-minute password-reset countdown. Set a new password in the Web Console within five minutes.
- If the reset is not completed, the dialog closes automatically. The device returns to the previous screen and the Web Console returns to the sign-in page. Select “Forgot password?” and try again.
3.4 Unable to Authorize Home Assistant?
- Make sure the device is connected to Wi-Fi.
- Make sure Home Assistant and the device are on the same local network.
- Make sure the Home Assistant service is running properly.
- If necessary, restart both the device and Home Assistant, then try again.
3.5 Unable to Control an Entity?
- Make sure the entity is not disabled in Home Assistant.
- Make sure the entity is online and available in Home Assistant.
- Check the connection between the device and Home Assistant, and confirm that the status is “Authorized and connected.”
- Make sure the entity supports control. Some entities only report their status and cannot be operated.
- Make sure the device is connected to Wi-Fi and is on the same local network as Home Assistant. Network issues can cause control commands to fail.
- Try controlling the entity directly in Home Assistant to determine whether the issue is with Home Assistant or the device.
3.6 How Do I Restore Factory Settings?
- Press and hold the Boot button for 10 seconds to restore the factory settings.